
AMP Project is an open-source initiative spearheaded by Google that aims to provide mobile-optimized content that can load instantly everywhere. AMP is a way to build high-performance web pages for static content that render fast. And, there are three important elements to AMP –
Table of Contents
AMP HTML
AMP HTML is the usual HTML extended with custom AMP properties. Though most tags in an AMP HTML page are regular HTML tags, some HTML tags are replaced with AMP-specific tags. These custom elements, called AMP HTML components, make common patterns easy to implement in a performant way. For example, the amp-img tag provides full srcset support even in browsers that don’t support it yet.
AMP JS
The AMP JS library implements all of AMP’s best performance practices manages resource loading and gives you the custom tags mentioned above, all to ensure a fast rendering of your page. Among the biggest optimizations is the fact that it makes everything that comes from external resources asynchronous so nothing on the page can block anything from rendering. Other performance techniques include the sandboxing of all iframes, the pre-calculation of the layout of every element on the page before resources are loaded, and the disabling of slow CSS selectors.
Google AMP Cache
The Google AMP Cache is a proxy-based content delivery network for delivering all valid AMP documents. It fetches AMP HTML pages, caches them, and improves page performance automatically. When using the Google AMP Cache, the document, all JS files, and all images load from the same origin that is using HTTP 2.0 for maximum efficiency.
How to setup Google AMP in WordPress
Step 1 – Install and activate the AMP for WordPress plugin by WordPress.com VIP, XWP, Google, and contributors. Once the plugin is active, it will dynamically generate AMP-compatible web pages for all the posts on your site.
Step 2 – Check if the AMP pages on your site are accessible and working by appending ?amp=1 to the end of any random blog post URL. For example, if the URL of your blog post is https://antonyagnel.com/how-to-setup-google-amp-in-wordpress/ you can test it by visiting https://antonyagnel.com/how-to-setup-google-amp-in-wordpress/?amp=1. If it loads a simplified view of your blog post, AMP has been implemented and is working fine. Else if it is throwing up a 404 error, it means that the plugin was not able to generate AMP pages for your site. Most of the time, it must be because you haven’t enabled pretty permalinks on your site yet.
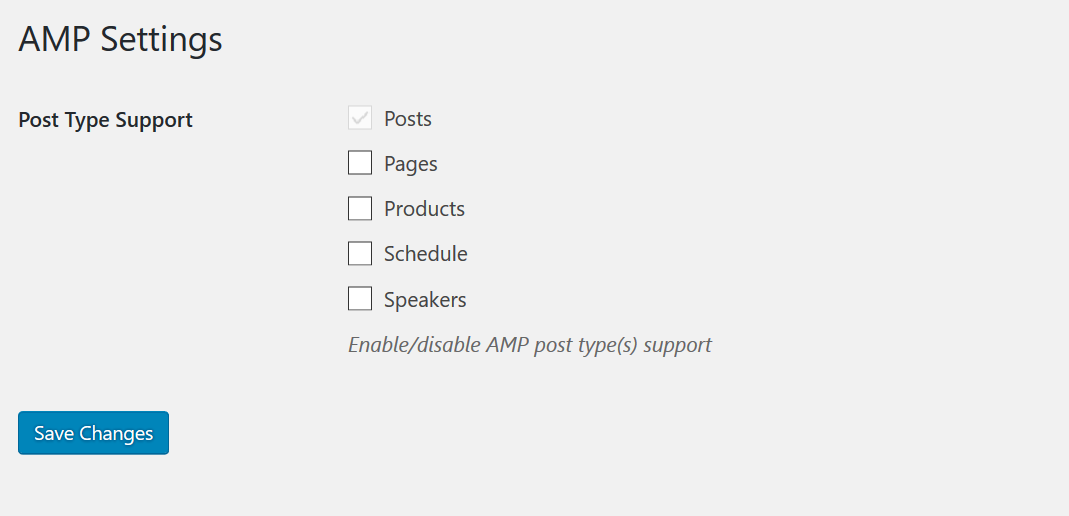
Step 3 – By default, this plugin enables AMP only for all posts on your site and not pages. You can enable support for pages and other custom post types too (like products if you are using WooCommerce and own an online store) by visiting AMP Settings which can be found on your WordPress menu.
Step 4 – Now that you have finished configuring the AMP for WordPress plugin, it is time for you to resave the permalinks. If you don’t know how to resave the permalinks in WordPress yet, follow the instructions in this post under ‘How To Reset Permalinks In WordPress’. It is quite simple actually and helps fix most of the errors the plugin could encounter while making changes to your database.
Step 5 – Clear the cache. If you are using any caching plugin on your site like WP Super Cache, WP Rocket, W3 Total Cache, SG Optimizer, etc, just go ahead and clear all your cache files. If you are using Autoptimize and Cloudflare, clear those files too.
Now, your WordPress site is all ready and AMP’d up. You can check the accelerated mobile pages on your site using the AMP validator tool available over here or by using this Chrome extension. This step is not really needed but can help you debug some problems that may be present with your AMP pages.
The whole process was simple, right? I know that you are nodding your head up and down with a yes. Now, if you found this guide to setup Google AMP in WordPress helpful, share it with your friends on Facebook or Twitter!
Continue Reading:
Excellent post! We are linking to this particularly great post on our site. Keep up the good writing.
Thanks for the appreciation.
Nice article, very helpful! Thanks for sharing!
You’re welcome Aayush, glad you found it helpful!