
Table of Contents
Why Move Away From WordPress.com
If you are new to blogging, WordPress.com is a great place to start with. But as time goes and you realize the greatest potential of blogging to express yourself, growing your fan base, business purposes, making money out of your blog, etc you would have realized that you need something more and powerful to play with. This realization is exactly the signal we need to migrate the site from WordPress.com to a self-hosted WordPress site (WordPress.org).
Follow this detailed tutorial to move your free WordPress.com site to a server you own.
WordPress.com vs. Self-Hosted WordPress: What’s the Difference
If you do not know the differences between WordPress.com and WordPress.org and feel it is confusing, you should read the differences between WordPress.com and WordPress.org.
Now is the big time you have always been waiting for to migrate your site from WordPress.com to your own hosting account.
By migrating to self-hosted WordPress, all the restrictions you were facing over at WordPress.com will be removed.
Steps Involved In Migrating from WordPress.com to Self-hosted WordPress
For this tutorial, here are the scenarios :
- Migrating a WordPress.com blog with a custom domain name.
- Migrating from the free hosted WordPress platform to the same domain name on SiteGround hosting.
- Another recommended host is Bluehost.
If your case does not fit the above scenarios, don’t worry. The steps are still the same. Simply ignore all the steps that are not relevant to your scenario.
Exporting Your WordPress.com Blog
To begin the process of migrating your site, you need to export your WordPress.com blog by following the below steps –
- Log in to your WordPress.com dashboard (wp-admin).
- Click Tools –> Export.
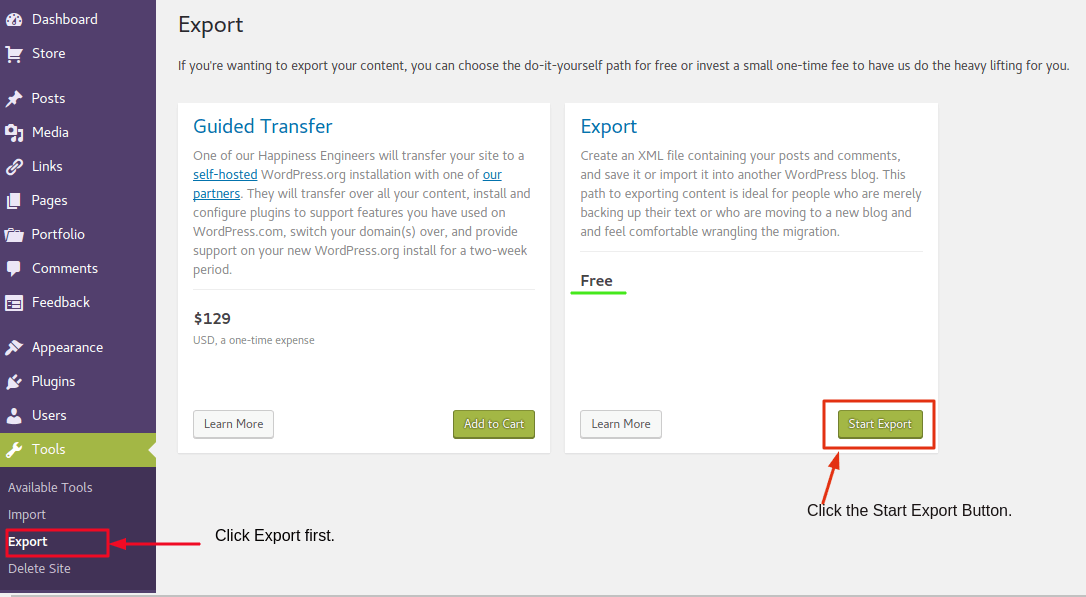
- After clicking on the Start Export button, select ‘All Content‘ on the next screen.

- Click ‘Download Export File‘.
- You will now be able to download the ‘.XML’ file of your WordPress.com blog. The coming steps are fairly simple compared to this. Now, all you need to do it set up WordPress on your hosting account and then import the XML file (All steps are mentioned below).
Install WordPress and Import Content from WordPress.com
In our case, we are using SiteGround to host our website. Here is the step by step guide to install WordPress on SiteGround.
Once you have installed WordPress on your hosting account, log in to your freshly installed WordPress dashboard and delete the default ‘Hello World’ post and ‘About’ page.
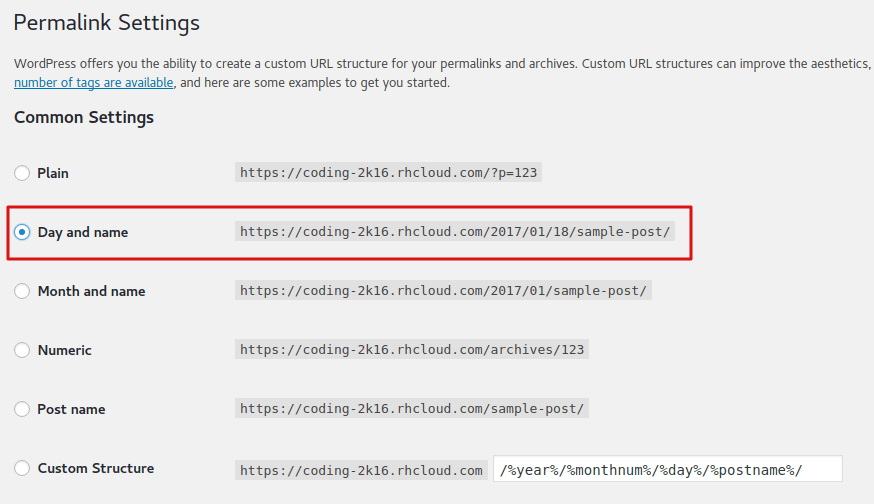
Then, go to Settings–>Permalinks page and select ‘Day and name‘ as the default permalink structure. Don’t forget to hit the Save Changes button at the bottom of the page.
Now, navigate to Tools–>Import page and install the WordPress importer plugin.
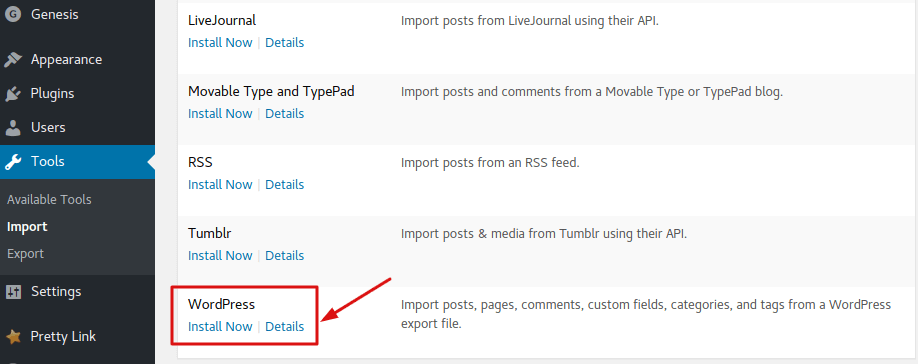
After it is installed, click the ‘Run Importer‘ button.
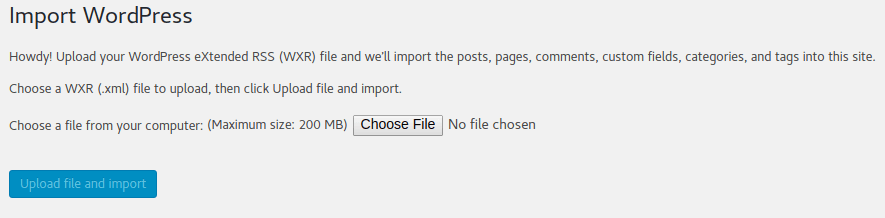
NOTE: Many web hosts have an upload limit of 2MB. You need to check the size of your exported XML file and make sure that your hosting has a higher upload limit than the file itself. For example, in the above screen, you can see that the maximum upload size is 200 MB.
- SiteGround has a 100MB upload limit.
- Bluehost has a 10MB upload limit.
If you still need a higher upload limit, you can get in contact with the hosting provider’s support team and they will be able to assist you.
Once you’ve imported the XML file, you will need to assign the imported content to an author.
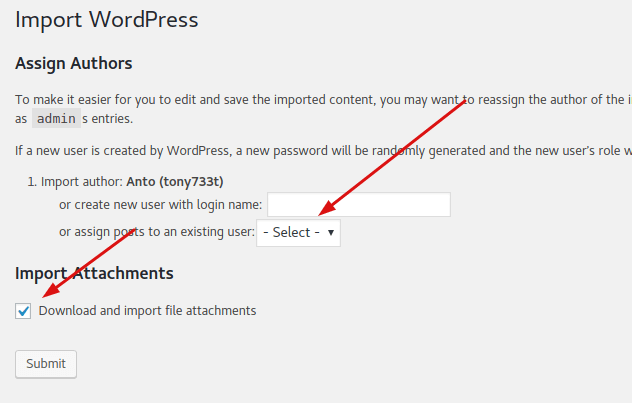
Select ‘Download and import file attachments‘ to import all your images and other uploaded files to your hosting account.
NOTE: If the above step fails at some point, you can keep on trying to import until all the content has been successfully imported. You needn’t worry about duplicate content as it does not import the same files again. You can also use the Import external attachments or Cache images plugin to import all the external WordPress.com images to your site if it keeps failing.
Depending on the number of posts and media files, it will take a few minutes to import all the content successfully from WordPress.com.
After everything has been imported, around 95% of the migration is complete.
301 Site Redirect Using Official WordPress.com Add-on
NOTE: This applies only if you were not using a custom domain name (such as example.com) with your WordPress.com site.
Though this step is not compulsory, adding will redirect example.wordpress.com (as well as all of your permalinks) to your new domain name. This will also make sure you do not lose any traffic or backlinks.
Open the Site Redirect page to purchase the add-on for your site.
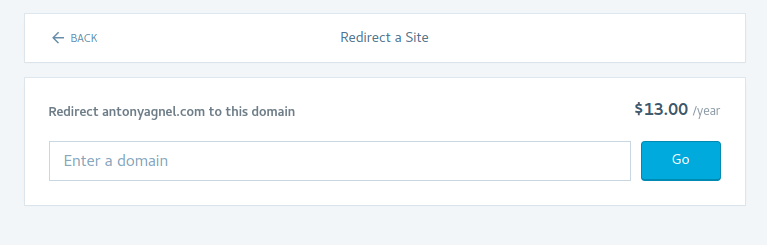
After purchasing the add-on, WordPress.com will take care of all the back-end stuff for you and all visitors to your old WordPress.com address will be redirected to your new site.
Migrating Subscribers from WordPress.com to Self-Hosted WordPress
You can migrate the subscribers from WordPress.com to your self-hosted WordPress by installing the Jetpack plugin. Here’s the official guide for moving your followers to your new site.
That’s it.
You have now successfully migrated your subscribers from WordPress.com to your own self-hosted WordPress site.
Frequently Asked Question
Should I now delete my WordPress.com site?
If you are using the Site Redirect feature, you should not delete your WordPress.com blog. Even if you are not using that feature, I still recommend you to leave your WordPress.com site as it is. Just turn on the ‘Discourage search engines from indexing this site‘ feature by visiting the Settings–>Reading page.
Now that you have successfully migrated your site you can configure it further, install essential plugins and monetize your site as per your wish, etc.
Conclusion
If you have still got any questions regarding migrating your free WordPress.com blog to a self-hosted installation, facing any issues by following the above guide or any other doubts you can feel free to let me know via the comments section. You can even hire me to do the job for you.
By the way, don’t forget to share this guide with other WordPress.com users! 🙂
My followers will also be exported?
Yeah, you will have to install the Jetpack plugin by WordPress.com to export your followers.
Well written information. This is what I’ve been looking for in a long time. Thank God the search is over. Well it’s easy to follow all the process thank you for this and keep it up!
Thank you so much for the compliment Gustavo. Glad that you found this guide easy to follow.
I redirected my WordPress.com blog to a new site using WordPress.org. The overall site gets redirected, but individual posts get error messages “page not found” on the new site. The WordPress.com blog had the date as part of the post permalink, and the WordPress.org site does not and puts the posts in a subdirectory called /blog/. How do I make this work?
Thanks.
Follow the instructions in this post to access the WordPress permalinks settings page and choose ‘Day and name’ as the default permalink structure. Don’t forget to save changes!