
This guide will help you in configuring the Yoast SEO (formerly WordPress SEO) plugin. Though a few visual changes have been made as of version 4.0, most of the configurations remain the same. I’m making sure this post remains updated as and when a new version of this plugin is released and has got major changes.
Whenever we talk about the best on-page SEO plugins available for WordPress, Yoast remains the most famous name. Every major site out there which is powered by WordPress use Yoast SEO plugin to optimize their site for search engines. This is the only plugin you will ever need to optimize your site for SEO.
Since this plugin is packed with a whole lot of features, it might be confusing for first-time users and other amateur WordPress users to configure it properly. To optimize your site to the fullest extent, I recommend you to follow this guide and configure it rather than just activating it and leaving it like that.
This is the reason why I’m sharing this tutorial to help you configure this plugin for optimum performance in SEO.
Table of Contents
Guide To Configuring The WordPress Yoast SEO Plugin
Since the Yoast SEO plugin is feature-rich and offers a large number of options, setting up this plugin is not an easy task for new bloggers or people without basic skills in search engine optimization.
Also, configuring this plugin incorrectly can lead to some undesired consequences like getting some parts or your entire site to be removed from Google’s index.
Here’s a list of some exciting SEO features offered by the plugin –
- Site verification with search engines like Google, Bing, and Yandex.
- Pinterest domain verification.
- Open Graph tags.
- Sitemap generation.
- Breadcrumbs.
- Edit robots.txt and .htaccess
- SEO settings importer.
These are just some of the many features available in this plugin. Moreover, all these features are provided for FREE!
Complete Setup & Configuration Guide for the Yoast SEO WordPress Plugin
If you have currently installed any other SEO plugin such as All in One SEO Pack by Michael Torbert or Genesis SEO you can import the settings into this plugin without any hassle.
You can install the plugin directly from your WordPress dashboard or upload it via FTP and activate it.
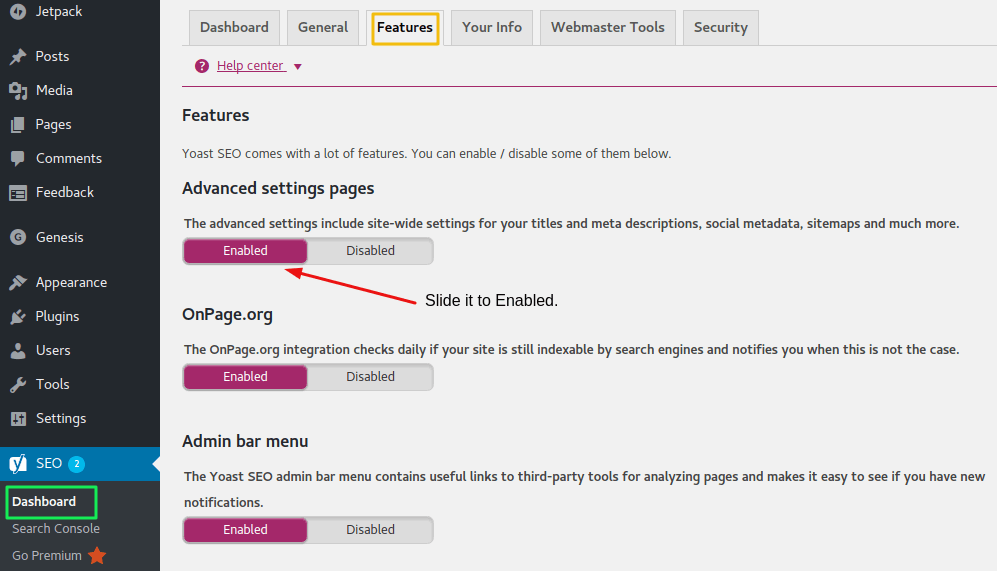
Once the plugin is activated, go to SEO –> Dashboard –> Features page and enable ‘Advanced Settings pages’. Do not forget to hit the save changes button at the bottom of the page.
If you were using any other SEO plugin on your WordPress site before installing Yoast, go to SEO –> Tools page and click on ‘Import and Export’. Now choose the ‘Import from other SEO plugins’ tab.
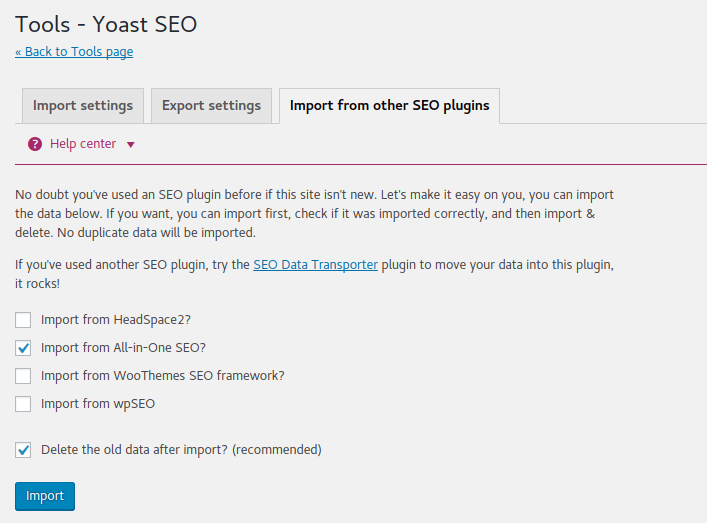
Choose the plugin from which you wish to import the SEO settings from. Also, make sure you have ticked the ‘Delete old data after import?’ checkbox.
Yoast WordPress SEO Dashboard
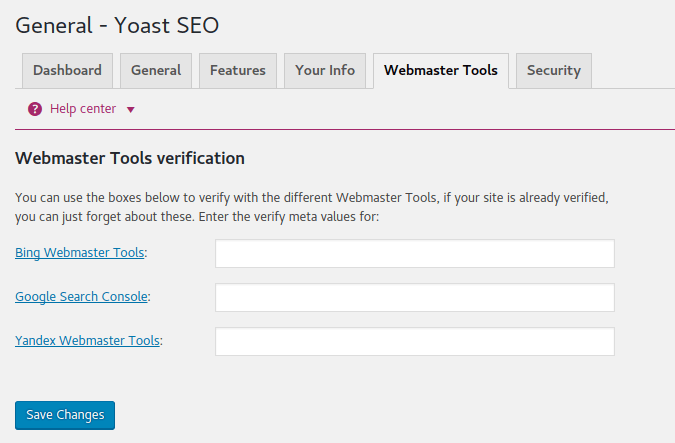
The very first step is to submit your site to search engines like Google, Bing, and Yandex. Go to SEO –> Dashboard page and click on ‘Webmaster Tools’ tab to access these settings.
To get your verification codes, just click on the name of the search engine on that page.
Once this part has been configured, we can start configuring the advanced settings of this plugin.
Titles & Metas
Configuring this part of the plugin is very important. Have a look at the screenshots below to aid you in configuring it correctly.
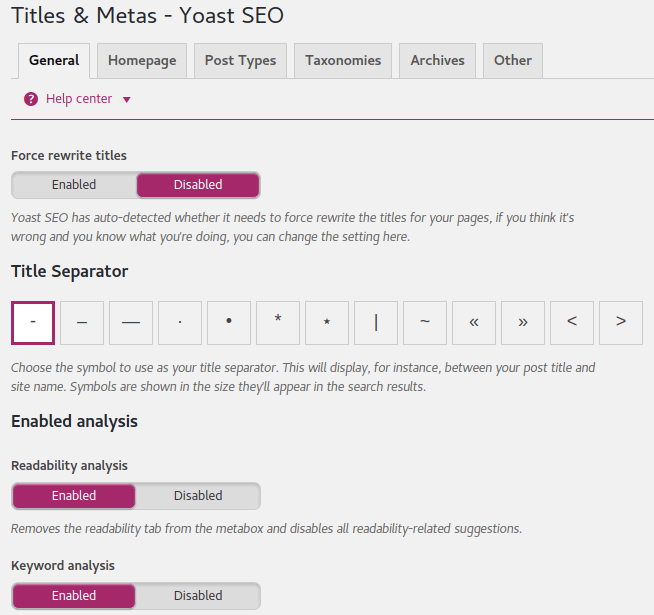
You can access these setting by going to SEO –> Titles & Metas page and clicking on the ‘General’ tab. I would recommend you to leave the settings under the General tab as it is unless you want to change the title separator.
Homepage
To configure the settings for your homepage title and meta description, click on the ‘Homepage’ tab under Titles & Metas.
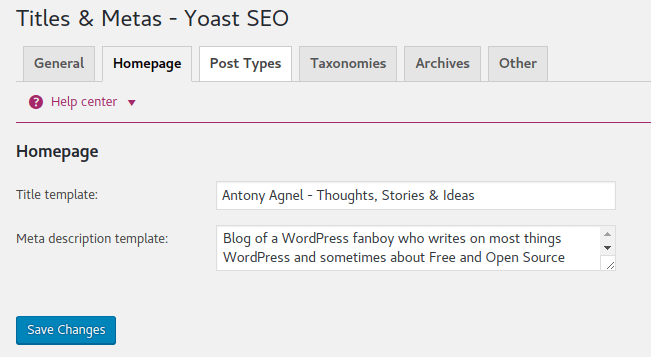
Title template: The homepage title of your site which you want to be displayed in search results.
Meta description template: Homepage meta description for search engines.
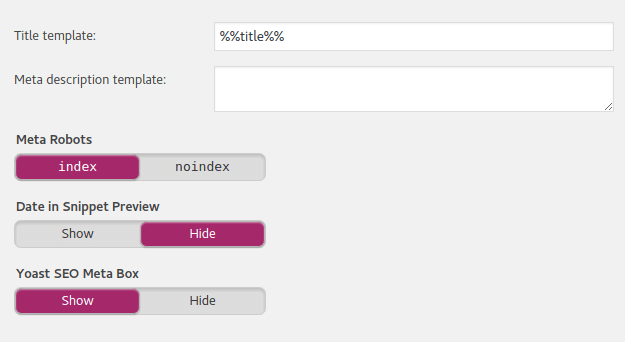
Post Types
Here’s where you will be configuring the SEO settings for all your post types (posts, pages, and media). If you are making use of any custom post types, it will also be displayed here. The SEO for your posts, pages, media and custom post types of your WordPress site can be defined over here.
Make sure you check out the help section so that you can understand the availability of various templates. By default, the plugin hides the date from being displayed in search engine result snippets. This is particularly useful if you are writing evergreen content.
But in case yours is a news site, you may want to display the dates in search results. Here’s how I have configured the plugin for my site (applies to all – Posts, Pages, and Media).
Taxonomies
According to the best SEO practices, we should mark tags and categories as noindex and dofollow.

Let the Format-based archive remain enabled, but mark it as noindex.

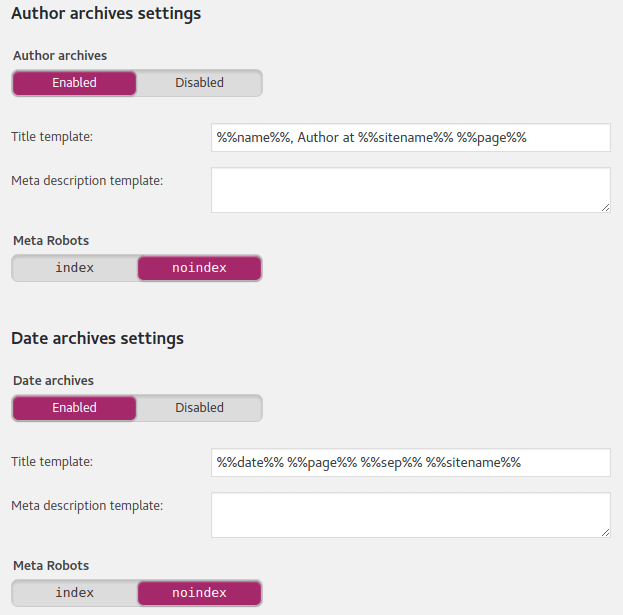
Archives
Over here, you can enable or disable author and date-based archives. I recommend you to mark it as enabled but noindex.
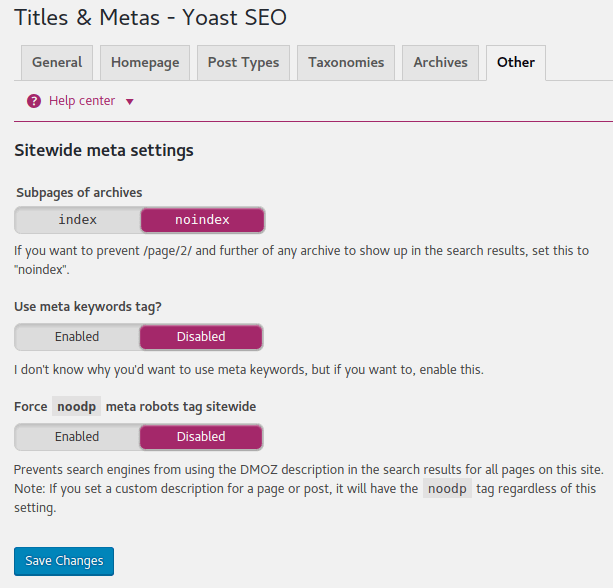
Other
Just enable noindex option for ‘Subpages of archives’ and let the other options remain as it is. Note that there’s no need for meta keywords tag anymore as Google made it official that they don’t use it for ranking websites.
Now we have successfully configured the Titles & Metas settings under WordPress SEO by Yoast.
Social
Google has a feature named Knowledge Graph and its purpose from a website’s point of view is to display the site’s social presence when a related search is made and the results are served from that site or are related to that brand name.
It’s quite easy to configure these social settings. All you need to do is fill out the required details. Have a look at my social settings for reference.
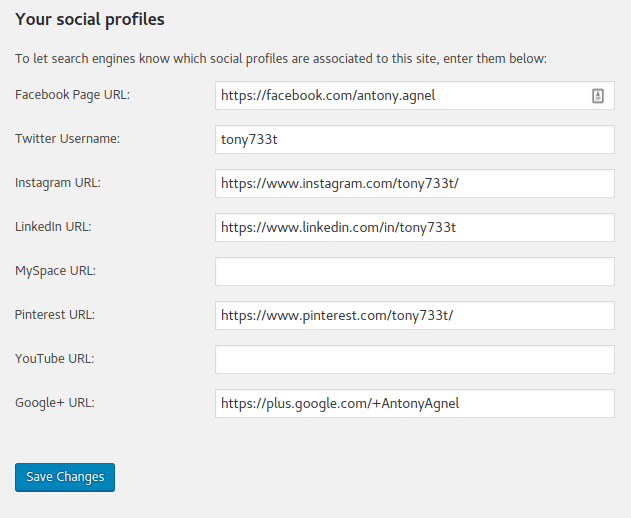
Leave the rest of the settings as it is for optimal performance.
XML Sitemaps
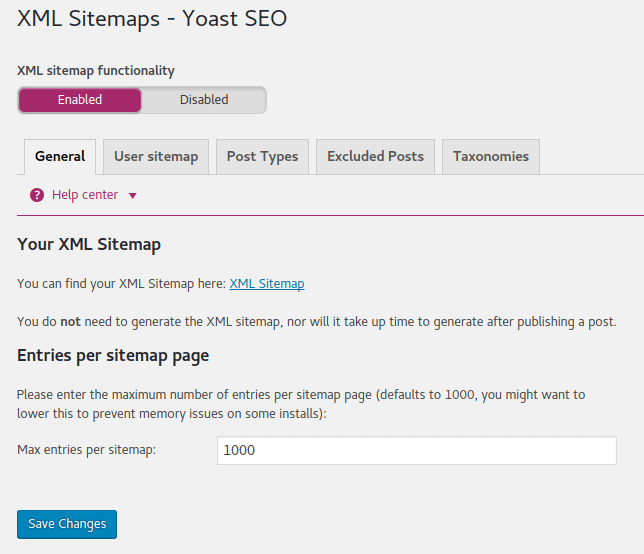
Make sure the sitemaps feature is enabled. Sitemaps are not intended for human reader consumption but are for search engines to understand the content of your website. After generating the sitemap, you should submit it to the search engines such as Google, Bing, and Yandex.
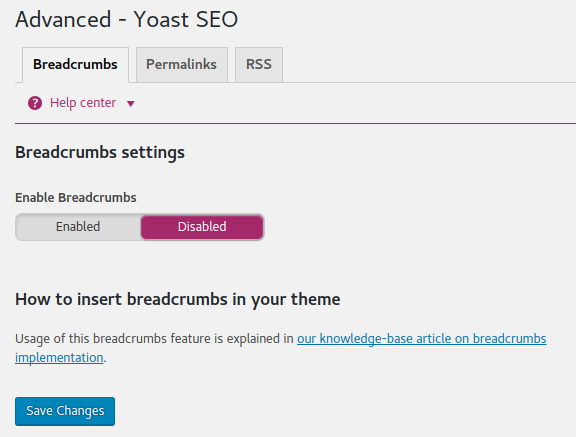
Breadcrumbs
Breadcrumbs are used to keep search engines and users informed of how your site is structured. It also helps in understanding the navigation of your site. To better understand breadcrumbs, read this article by Yoast.
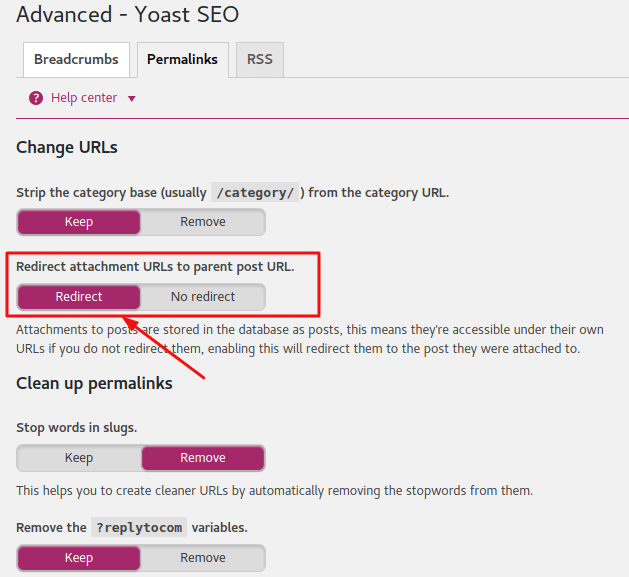
Permalinks
Go to SEO –> Advanced page and click on the ‘Permalinks’ tab to access this setting. Using these settings we can redirect individual attachments to their respective posts thereby driving traffic to your site from the image search results.
Also, we can remove the ?replytocom variables which will result in a huge improvement in crawl efficiency for search engines when you have a lot of comments on your site.
RSS
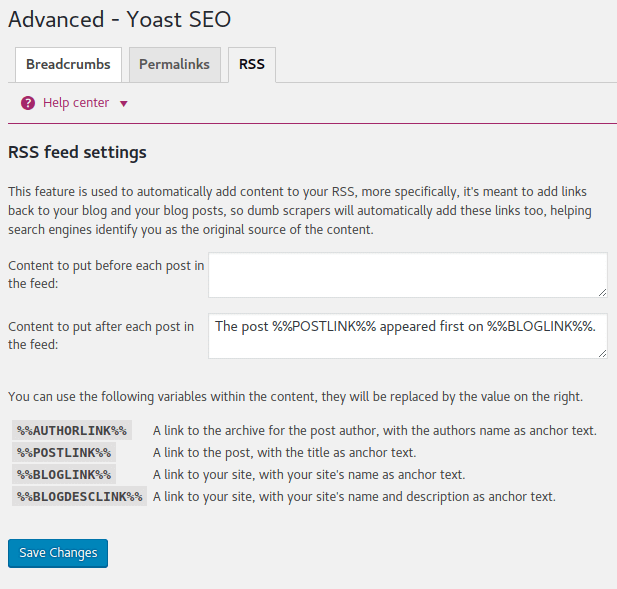
This setting applies to the RSS feed of your site. Using this setting you can add a link back to your site from the RSS feed articles of your site. Let the default settings remain as it is.
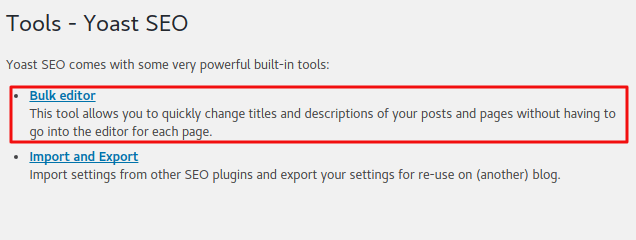
Bulk Editor
Using this tool we can quickly change the titles and descriptions of all our posts and pages without having to go into the editor for each page. It can be accessed from SEO –> Tools page.
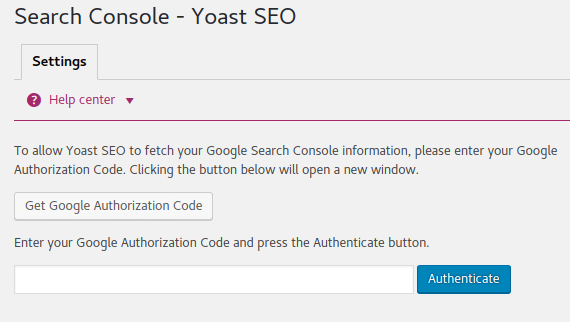
Search Console
This feature allows Yoast SEO to fetch your site’s information from Google Search Console and display it directly on your WordPress dashboard. Click on the ‘Get Google Authorization Code’ button to authenticate Yoast with Google Search Console. You can also watch this video for visual instructions.
Conclusion
Thus I hope this tutorial helped you in setting up WordPress SEO by Yoast correctly. You can now test your site using Google’s Rich Snippets testing tool to view how to site is structured. If you liked this article, you might also be interested in reading my post on how to supercharge your website using the Jetpack plugin.
Your posts are veru much informative, so can you tell how can we generate income from WordPress blogs?
Since your blog is hosted on WordPress.com, there isn’t much of an option to choose from. If you have a WordPress.com Premium or Business plan, you can access WordAds and can set up advertisements on your sites immediately. Also, you can make use of affiliate links in your posts, provided that the primary purpose of your blog is to create original content. Another option is to accept sponsored posts from advertisers. Hope this answers your question.
Thanks for your answer. And yes, it is very helpful.
Well this is indeed comprehensive, nice and useful read.
Glad that you found it useful.
So far the most informative article about Yoast.
Nice work author.
Yay! Thank you for the appreciation Mukul. Glad that you found it informative.
Really informative.
Hey Bhavana, glad to know that you found it informative!
SEO by Yoast is so far a good plugin for the optimisation of WordPress based websites/blogs. Somehow they should reduce their prices. Premium version is very costly actually.
Yeah, they are simply the best and have made it easier to configure now for new users. I do agree that their premium plan is a bit more pricey but that’s just how their business model works. Let’s hope they become more affordable in the future.
Nice guide, thank you
You’re welcome Subham, looks like I’ve got to update the guide by the way. A lot has changed since I wrote this tutorial even though the basic configuration is the same.
If you are installing Yoast SEO on a WordPress blog where you were using some other SEO plugin or theme SEO setting, after activating advanced setting you should go to import from other SEO plugins in the left panel. Select the plugin from which you would like and import your setting.
Hello Rita, thanks for chiming in and adding more value to this post.
I am searching on google for yoast plugin guideline and I find your post. And after reading your content, hopefully, now we can use yoast plugin easily. Thank you!