
Table of Contents
Introduction
Quite sometime back, I had shared a post on why you should use the Jetpack plugin on your WordPress site. Now, I am back to share a tutorial with you on how to install and configure Jetpack plugin on self-hosted WordPress so that you can get started easily. Jetpack is already popular with power WordPress users, but if you are new to WordPress and feeling confused with its settings and dashboard, you have come to the right place.
What is Jetpack for WordPress
Jetpack is a free plugin for WordPress offered by Automattic, the company behind WordPress.com. Though it may look humble, it is packed with many essential features for your site. All these features are termed as modules within the Jetpack plugin and they can be turned on or off depending on your needs. Each module is independent and adds an extra feature to your site. By using Jetpack, you can prevent yourself from installing unnecessary plugins to your site for various other functionalities. Because of the number of features it offers to its users, some people may call Jetpack bloated, to which I strongly disagree.
Jetpack Plugin Pricing Plan
Jetpack is currently available on four plans – Free, Personal, Premium and Professional. The free and personal plans are targeted at individuals with small websites or blogs. The free plan is free forever and the personal plan costs around $39 per year (definitely not much if you truly care about your site’s security).
The Premium & Professional plans will cost you around $99 and $299 per year respectively. All the basic (core) features are common among all the plans with additional features as you upgrade.
Go ahead and view the Pricing page? Click here! (opens in a new tab)
How to Install and Activate Jetpack Plugin from WordPress Dashboard
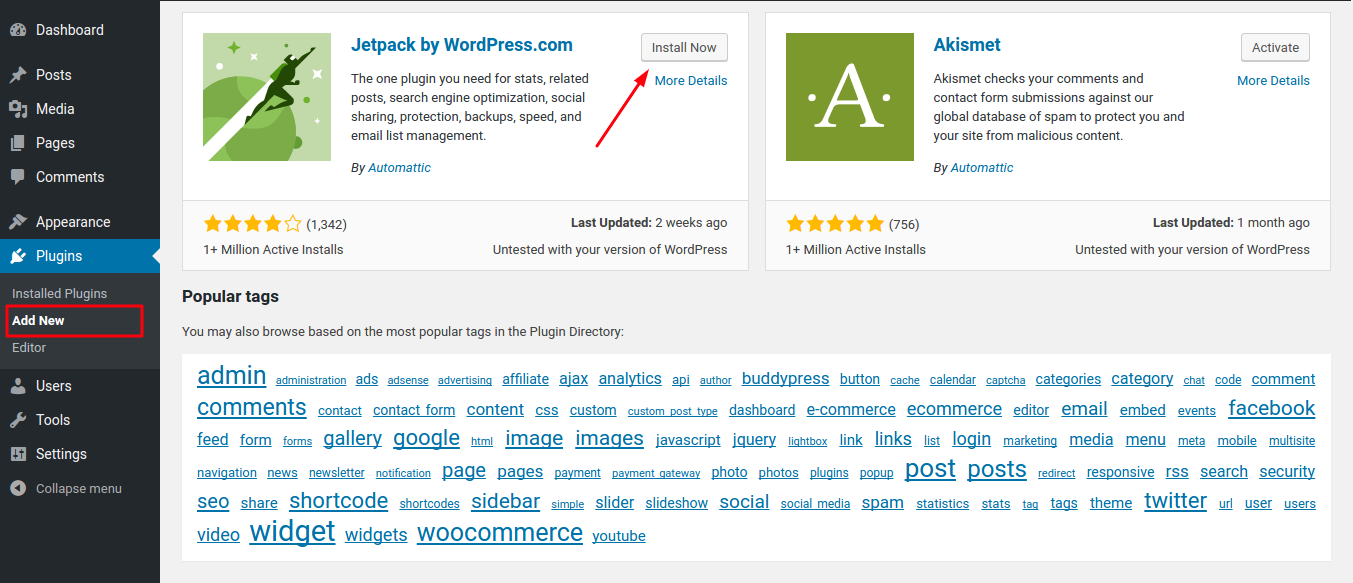
Step 1 – Go to the ‘Add Plugins’ section of your site and look for ‘Jetpack by WordPress.com’. It should be on the first page itself, thanks to its popularity. Now click ‘Install Now’ to download and install the Jetpack plugin.
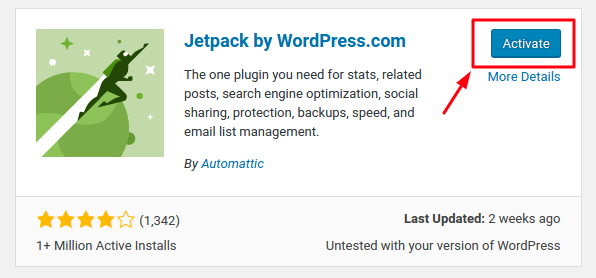
Step 2 – Once the installation is complete, click on the ‘Activate’ button.
Step 3 – Once the plugin is activated, you will be asked to connect it with WordPress.com. If you don’t have an account yet, you can get one from here.
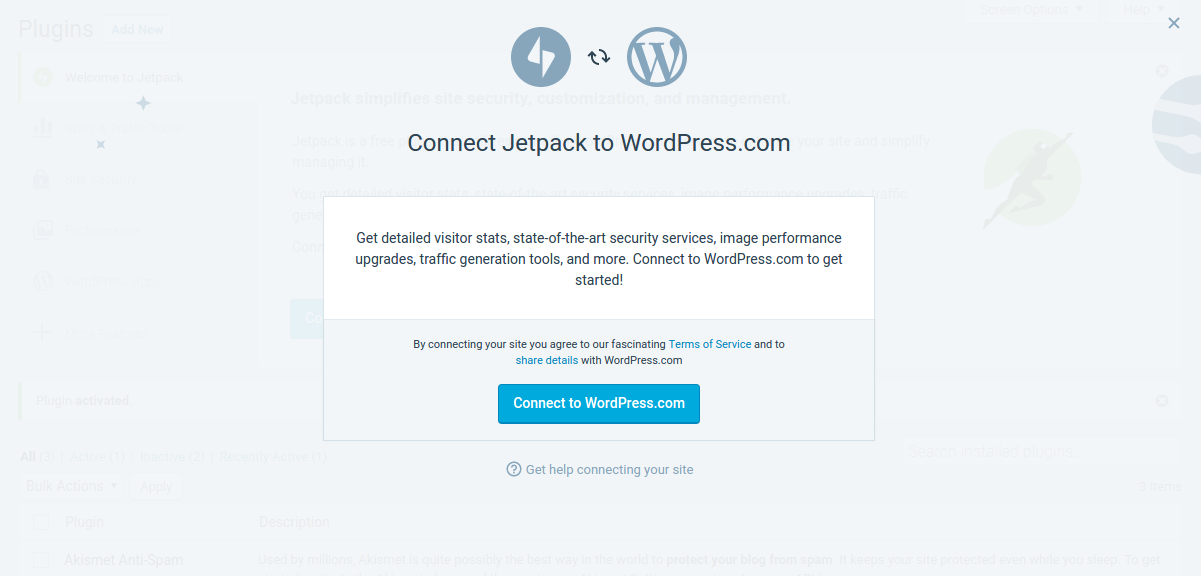
Step 4 – After creating an account on WordPress.com and logging into your account, come back to the above screen and click on the ‘Connect to WordPress.com’ button.
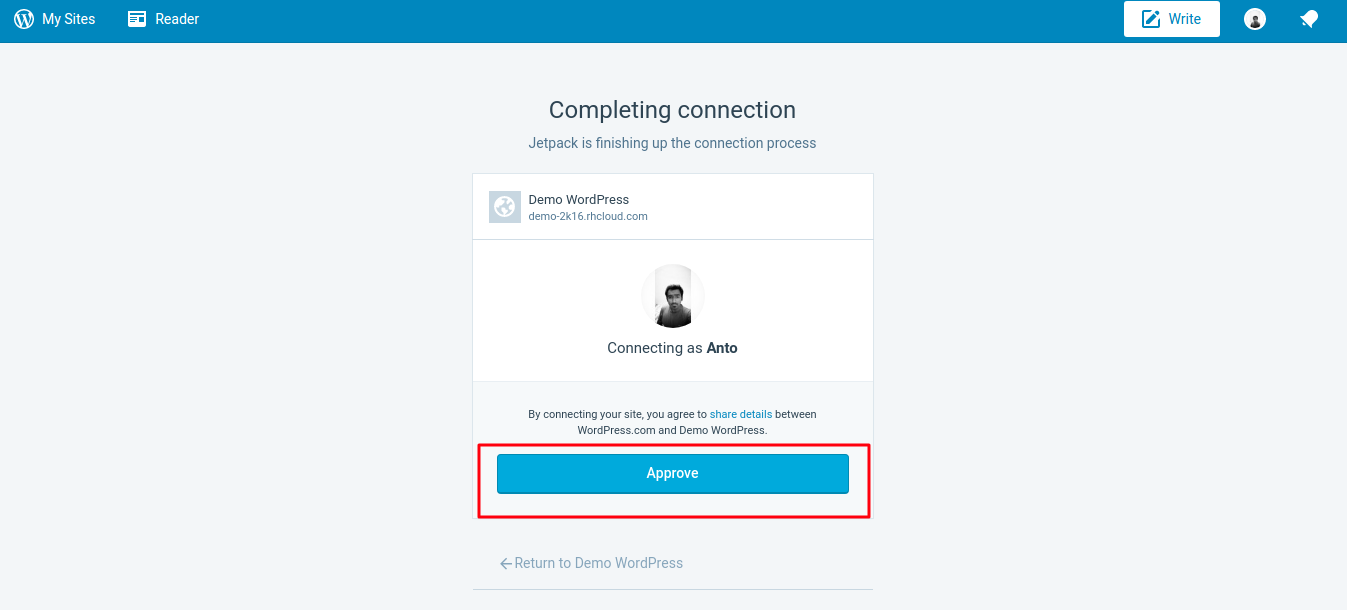
Step 5 – It will now ask you to confirm your action to connect your WordPress site with WordPress.com’s services. Click on the ‘Approve’ button to get started.
Step 6 – After you have approved the connection, it will try to authorize your website with WordPress.com. Once it gets authorized successfully, you will be asked to choose your ‘plan’.
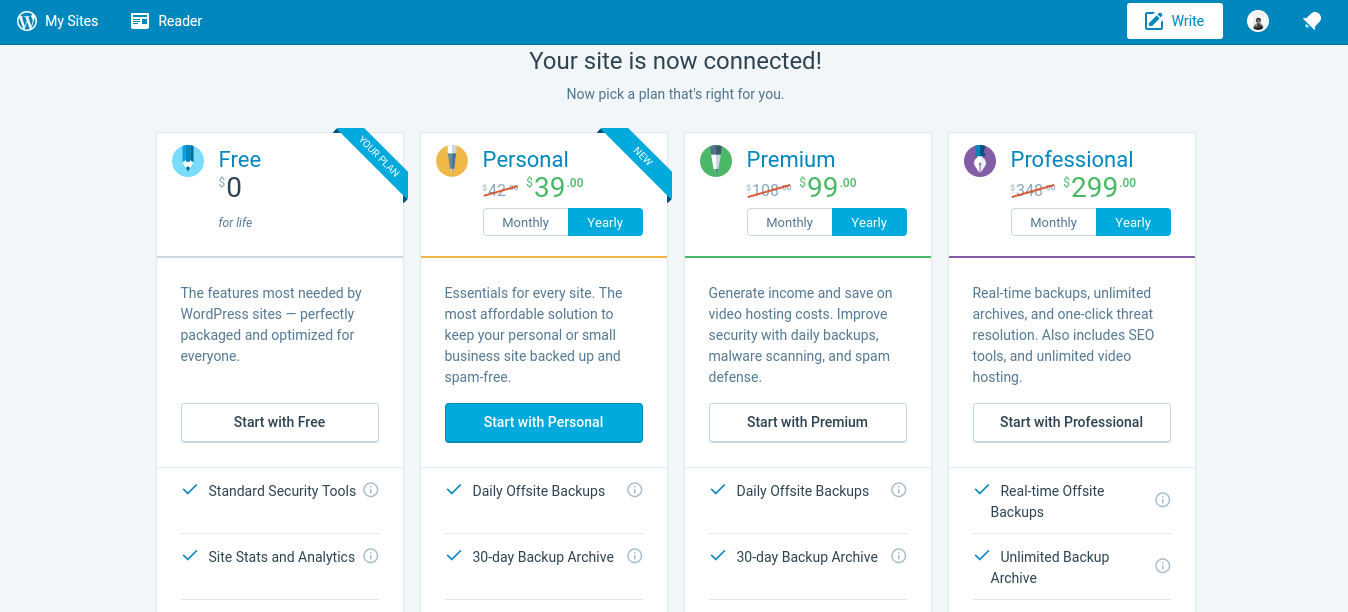
Step 7 – You can have a look at the feature-comparison on that page and choose whichever plan you feel would suit your site more accurately. To choose a plan, click on the ‘Start with’ button below the plan pricing.
Step 8 – Next, you will be sent back to your website with a jump-start screen to activate the recommended Jetpack features. Click on the ‘Activate Recommended Features’ button.
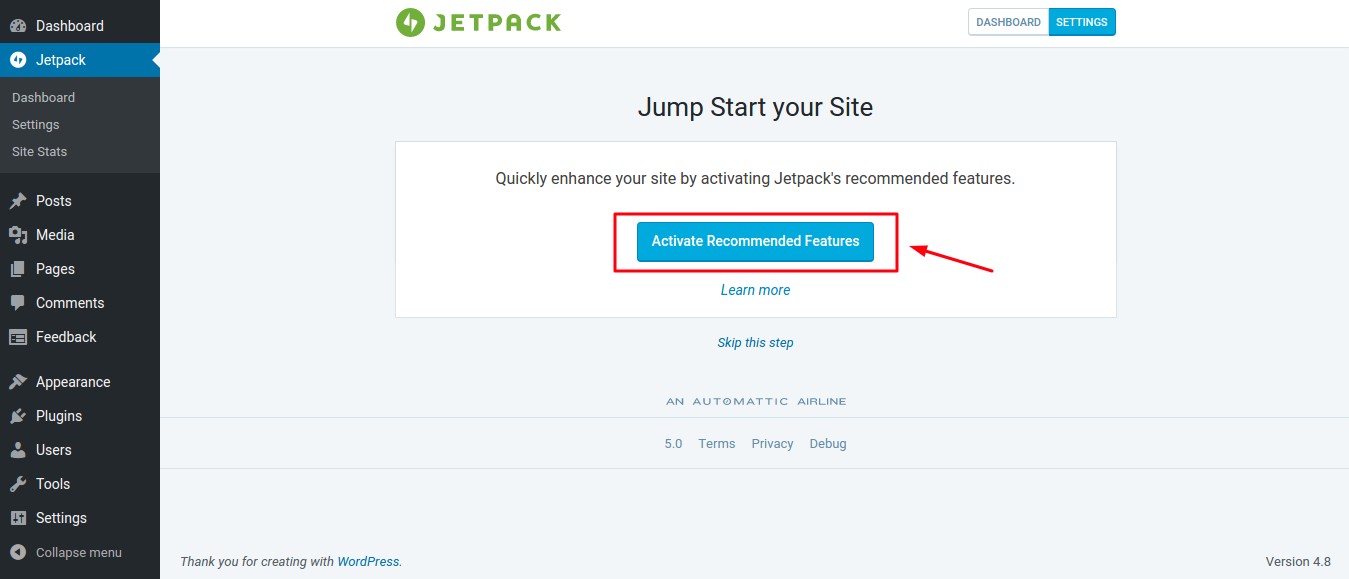
You have now successfully activated Jetpack along with the recommended features. Now, we will be playing around with the settings.
How To Setup Jetpack WordPress Plugin (Tutorial)
Step 1 – Switch to Jetpack settings page using the toggle on the top-right corner.

Step 2 – Under the writing settings tab, enable the WordPress.com toolbar if you’re comfortable using it instead of your site’s default admin bar. You will be liking it if you had been using WordPress.com previously.


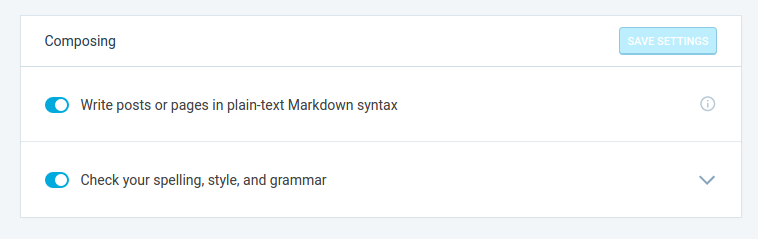
Step 3 – Now, scroll down to the ‘Composing’ section. You can turn on the ‘Write posts or pages in plain-text Markdown syntax’ module if you are already familiar with markdown. Markdown is basically used by people who want a quick and easy way to write rich text, without having to take their hands off the keyboard, and without learning a lot of complicated codes and shortcuts.
Leave the ‘Check your spelling, style, and grammar’ module turned on. It will assist you in proofreading.
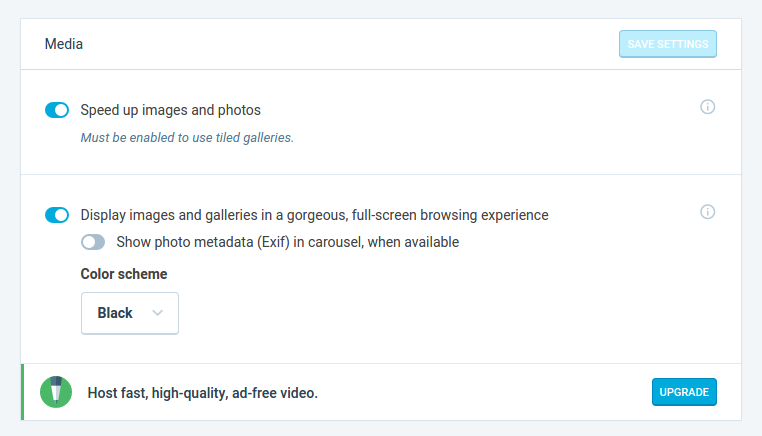
Step 4 – Come down to the ‘Media’ section and turn on the ‘Speed up images and photos’ module. This module will help you in offloading your images to WordPress.com’s server and then the images will be served from their global CDN to your site’s visitors. This will help you reduce your bandwidth usage as well as speeding up your site’s loading times.
For the best performance, turn on the ‘Display images and galleries in a gorgeous, full-screen browsing experience’ module.
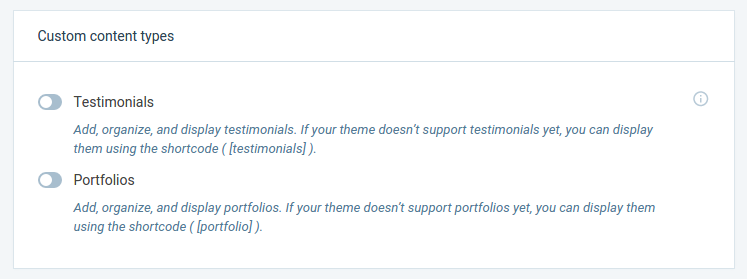
Step 5 – Under ‘Custom Content Types’, turn on the ‘Testimonials’ and ‘Portfolio’ modules if you want to add and display them on your site to your potential customers.
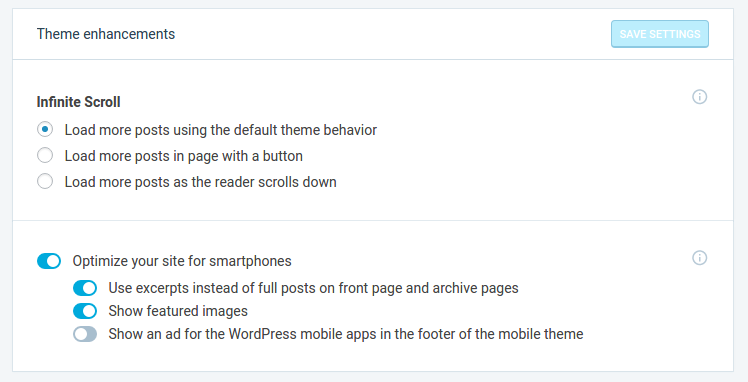
Step 6 – Coming to ‘Theme enhancements’, you can turn on the infinite scroll feature if interested. What it does is that it pulls the next posts automatically into view when the reader approaches the bottom of the page. Many news and magazine sites have enabled this feature to increase the chances of readers staying on their site for a longer time. This, in turn, reduces the bounce rate of your site and is good for SEO.
Moving on to the ‘Optimize your site for smartphones’ option, you can turn it on if your theme is not mobile responsive or if you want a simple & light-weight theme for your site when it is loaded from smartphones. If you are going to enable the mobile theme option, make sure you have switched on the ‘Use excerpts’ and ‘Show featured images’ option too.
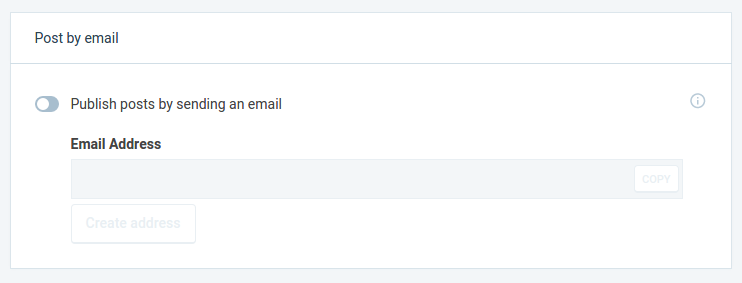
Step 7 – I think you can turn off the ‘Post by email’ module if you do not use emails to publish posts on your blog.
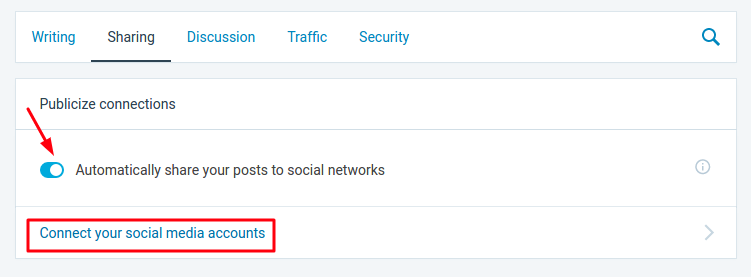
Step 8 – Now that we have finished configuring the ‘Writing’ settings in Jetpack, navigate to the ‘Sharing’ tab. Turn on the ‘Publicize connections’ option and click on the ‘Connect your social media accounts’ link just below it.
You will now be taken to a sharing settings page on WordPress.com, where you can manage your connections. Over here, you can connect all your social media profiles to Jetpack and every time you publish a new post on your blog, you can choose it to be shared automatically to all the connected networks.
This will save you a lot of time if you blog regularly and manually share the posts on Facebook and Twitter.
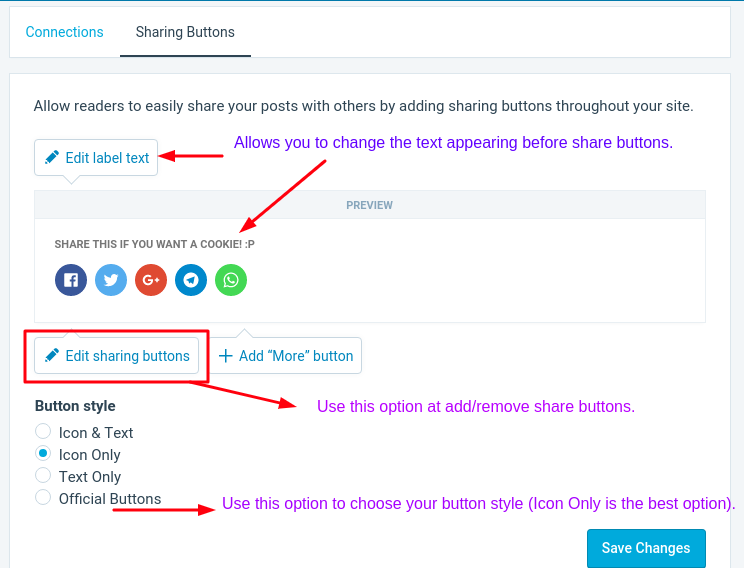
Step 9 – If you are already using a social sharing plugin on your site, you can skip this step. But, I recommend you to uninstall the sharing plugin you are already using and enable the ‘Sharing buttons’ module on Jetpack.
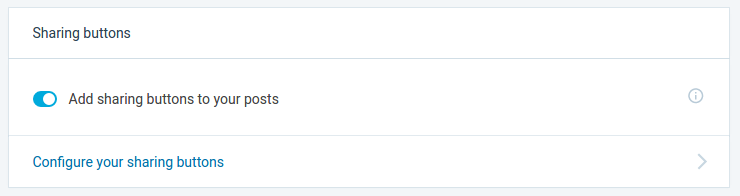
After enabling the sharing module, click on the ‘Configure your sharing buttons’ link below it to add to remove various sharing buttons.
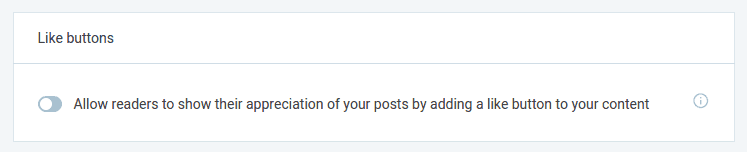
Step 10 – If you are coming to self-hosted WordPress from WordPress.com, you would most probably know what the ‘Like’ button means. Turning on this option is only suggested if you have got many WordPress.com followers. Also, note that someone can like your post only if they have a WordPress.com account – it’s like a ‘Facebook like’ button but for WordPress.
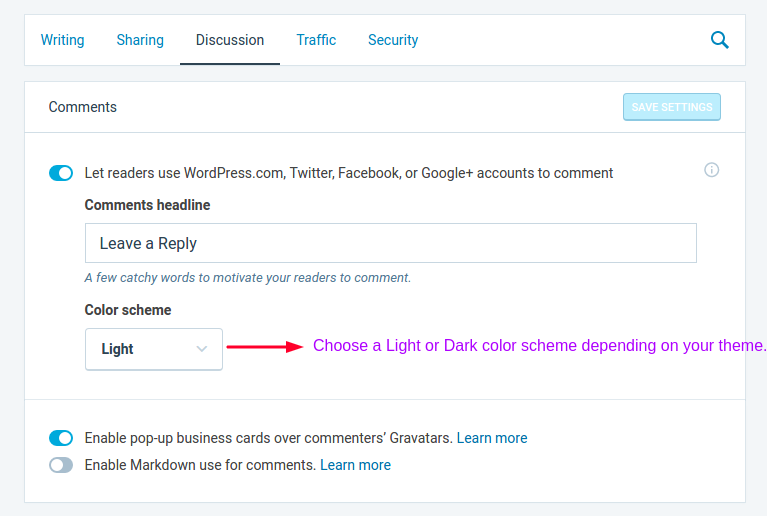
Step 11 – Now, let us move on to the ‘Discussion’ section. I recommend you to turn on the ‘Comments’ module because it looks better than the default WordPress comment box. Also, it gives your readers an option to comment on your posts using their social media profiles such as Facebook, Twitter and Google Plus. It also allows you to display Gravatar Hovercards over the person’s avatar.
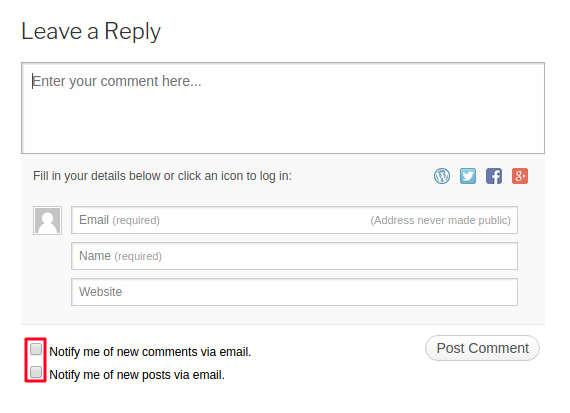
Step 12 – Scrolling down, you can find the ‘Subscriptions’ module. Enable it right away to harness the power of WordPress.com to allow your commenters and readers to subscribe to your blog posts. By enabling this option, you can display a subscription widget on your website (either in a sidebar, footer or wherever widget support is enabled). Also, you can display a comments subscription checkbox below your comments so that people can choose to get notified if someone replies to their comment (have a look at the screenshot above).
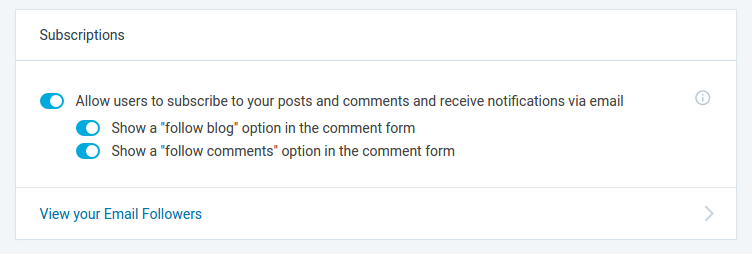
Another reason why you should use the subscriptions feature is that it helps you grow your list of email subscribers and it is one of the best assets anyone can have online.
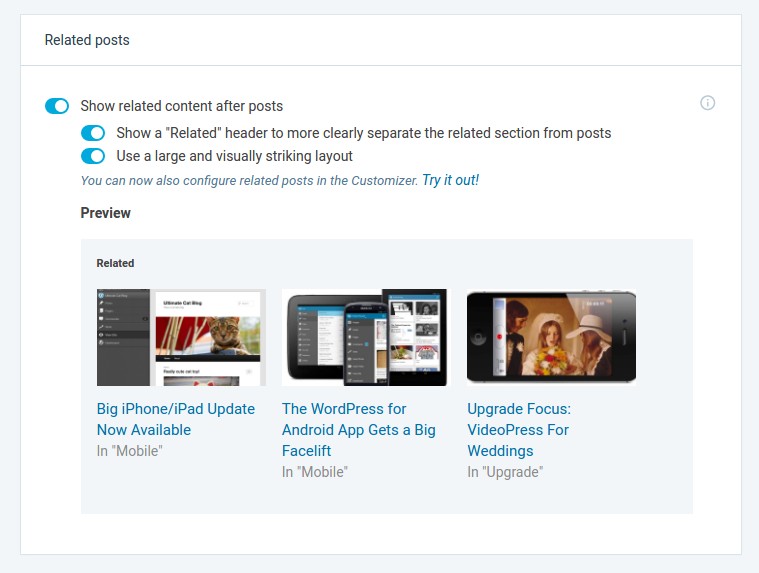
Step 13 – Moving on, let us navigate to the ‘Traffic’ section. Under ‘Site stats’ leave everything as it is. Scroll down to ‘Related posts’ and enable it if not already activated. For the best results and optimal performance, enable ‘Use a large and visually striking layout’ option.
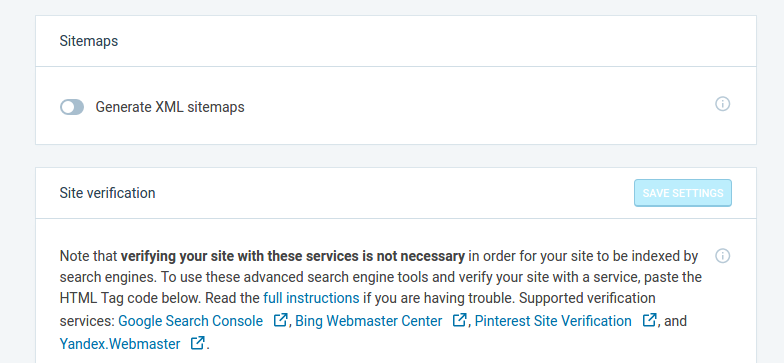
Step 14 – If you are using an SEO plugin like Yoast or All in One SEO Pack, there are high chances that you are already having the required XML sitemaps and site verification features for your website. If not, you can enable the ‘Sitemaps’ and ‘Site verification’ modules.
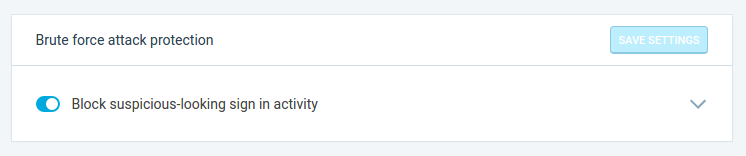
Step 15 – Finally coming to the last section, move on to the ‘Security’ tab. By default, the ‘brute force attack protection’ module will be turned on. Leave it as it is to protect your site from getting hammered by bad reckless bots which are always looking for ways to crack your login credentials.
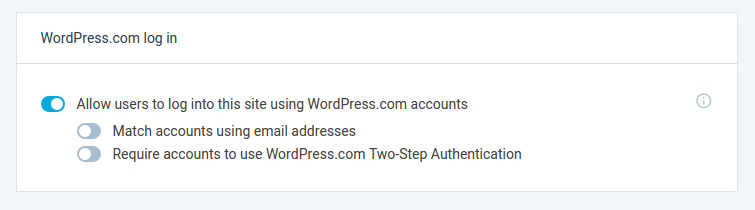
Step 16 – By turning on the ‘WordPress.com log in’ module, you will be able to securely log in to your site using your WordPress.com account. If wanted, you can also turn on two-step authentication for increased security.
Thus, we have now successfully configured the Jetpack plugin on your WordPress powered site.
Conclusion
In addition to all the above modules, Jetpack also allows you to monitor your site’s downtime, create short links for posts, block spam comments (by connecting with Akismet), create contact forms, display social media profiles on the website, add a Facebook page like widget & Twitter follow button, etc. And the beauty of Jetpack is that all these features are completely free for anyone! So many features packed within a single plugin, Jetpack is truly a beast with a neat and beautiful interface.
So what are you waiting for? Grab a Jetpack and fly right away! 😀
If you liked this post, you might also be interested in –
God, your posts on these things are always so informative and well put-together. Well done.
One question though, if one creates a free/personal website on WP.com, does the site already come with Jetpack pre-configured? I used to think so, उप until I read this post. Thanks 😊
Yes, it does! Almost all the free features available in Jetpack is already available on WordPress.com. Jetpack just helps you extend the functionality of self-hosted WordPress sites, where you build & configure everything from scratch.
Aah! Then I have something to help me with this website after all. Thank you 😀