
As a business or WordPress site owner, there may be times when you need to go through the email logs on your site. Email logs can help you determine the exact date and time when an email was sent, whether it was delivered or not, and to whom it was sent.
Email logging is a powerful feature that comes in handy when you are troubleshooting lost emails, issues with your email server, and more. It can also help you debug and find the root cause of issues with your email deliverability. Other times, it just remains in the background doing its job — silently logging all emails sent from your server.
Table of Contents
How to set up WordPress email logs
To log WordPress emails on your site, you need WP Mail SMTP Pro.
WP Mail SMTP Pro is the premium version of the free WP Mail SMTP plugin which I had earlier covered in my WordPress SMTP guide. The free plugin comes with options to configure popular email service providers like Mailgun, SendGrid, Gmail, and Sendinblue as your WordPress SMTP but doesn’t allow you to view email logs on your site.
By upgrading to WP Mail SMTP Pro, you can view the email logs right from your WordPress dashboard and also use Amazon SES or Microsoft Outlook as your WordPress mailer.
(Comes with 14 days money-back guarantee)
Step by step instructions to activate the email logging feature on your WordPress site using WP Mail SMTP Pro –
Total Time: 15 minutes
Download WP Mail SMTP Pro
Log in to your WP Mail SMTP account, navigate to the Downloads section, and click on the Download WP Mail SMTP button.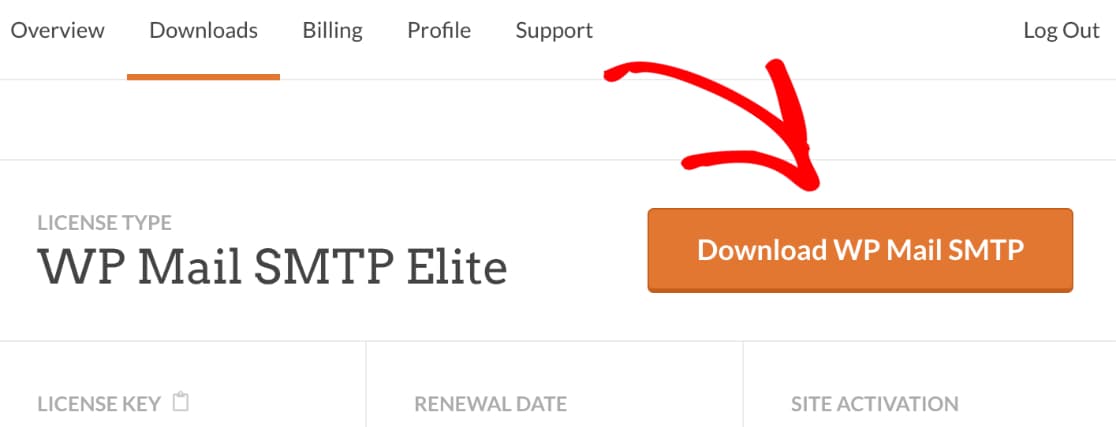
Install and activate WP Mail SMTP Pro
Go to the Add New plugins section on your site, click on the Upload Plugin button and choose wp-mail-smtp-pro.zip from your hard drive. Then, install and activate it.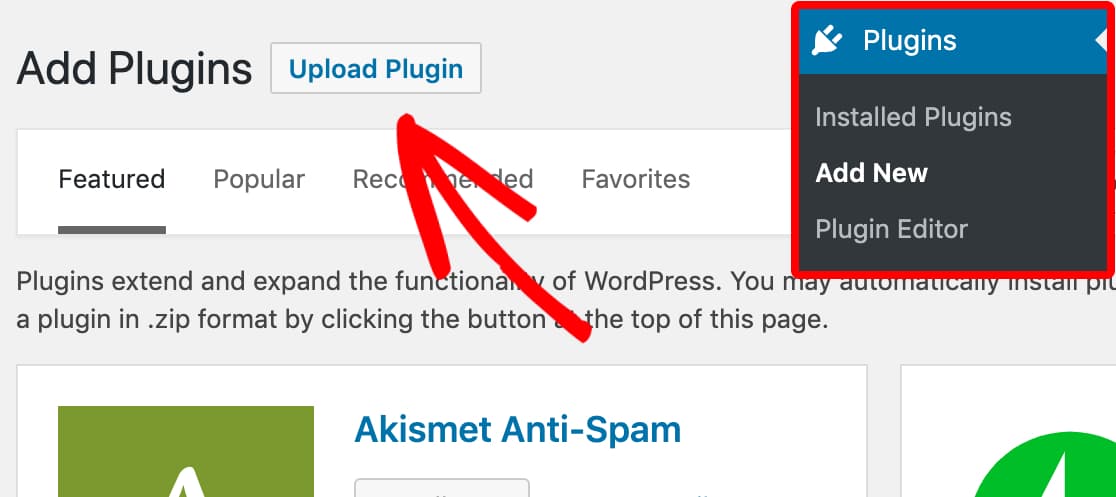
Verify your license key
To ensure that you get timely security and feature updates on your site, you need to activate the plugin with your license key. Navigate to the WP Mail SMTP –> Settings page, paste your license key and click on the Verify Key button.
If your license key is valid, it will display a success message along with your plan details under the License Key section (Pro/Elite/Developer/Agency).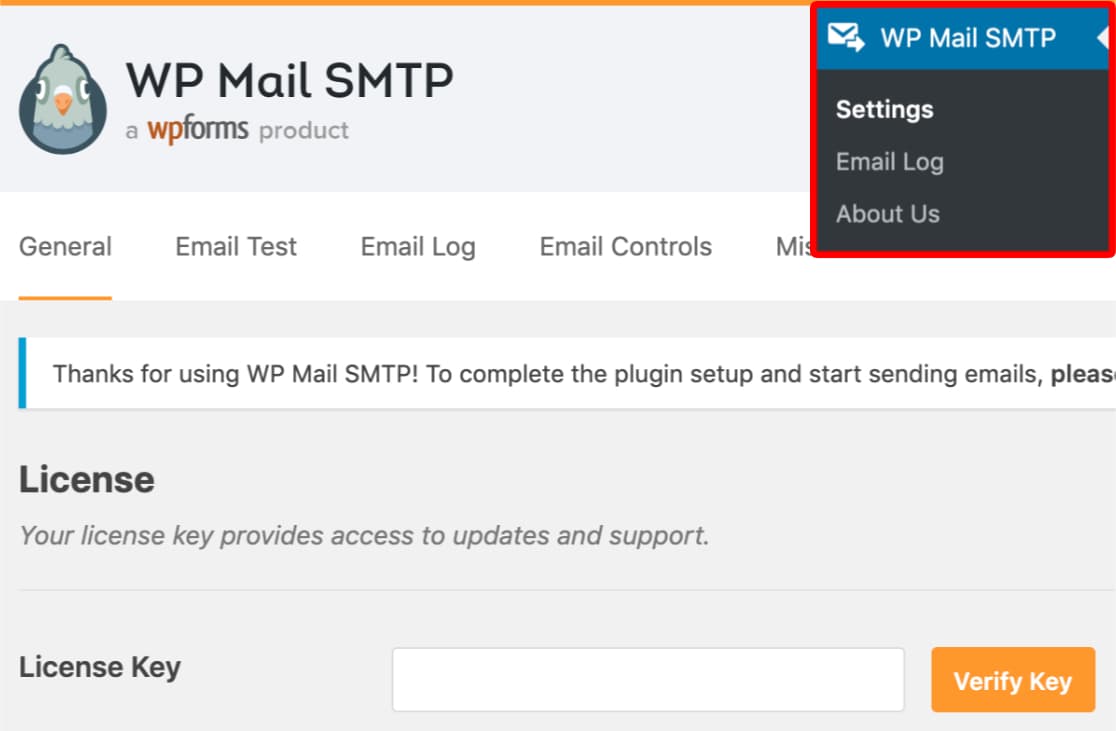
Navigate to the Email Log section
Now, click on the Email Log tab to configure email logging on your WordPress site.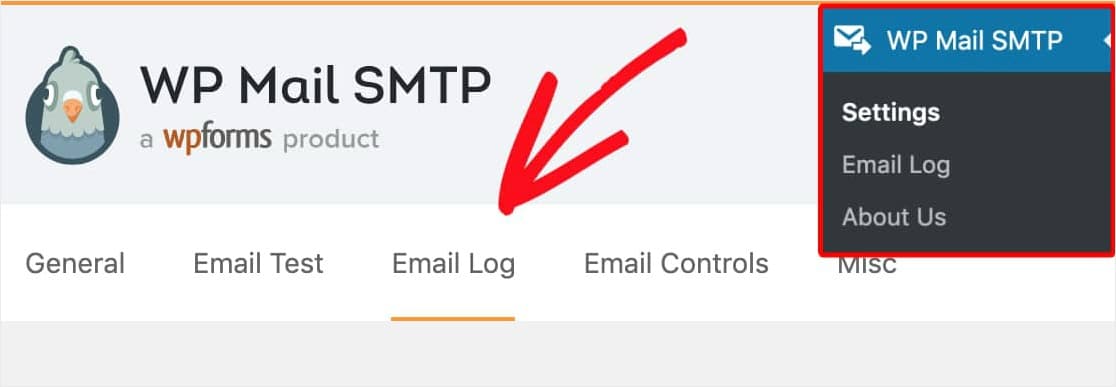
Enable email logging
Check the Enable Log box to start logging emails on your site. It will now start logging the details of every email sent out from your site – including the email delivery status, date and time, email subject, recipients, etc.
Log email content (optional)
Once you have enabled the Email Log option, a new Log Email Content option will be displayed just below it. You can check this if you want WP Mail SMTP to log the contents of your email as well.
NOTE: Do not enable this feature unless necessary because it stores the content of the email as plaintext in your site’s database. You can learn more about WordPress security from here.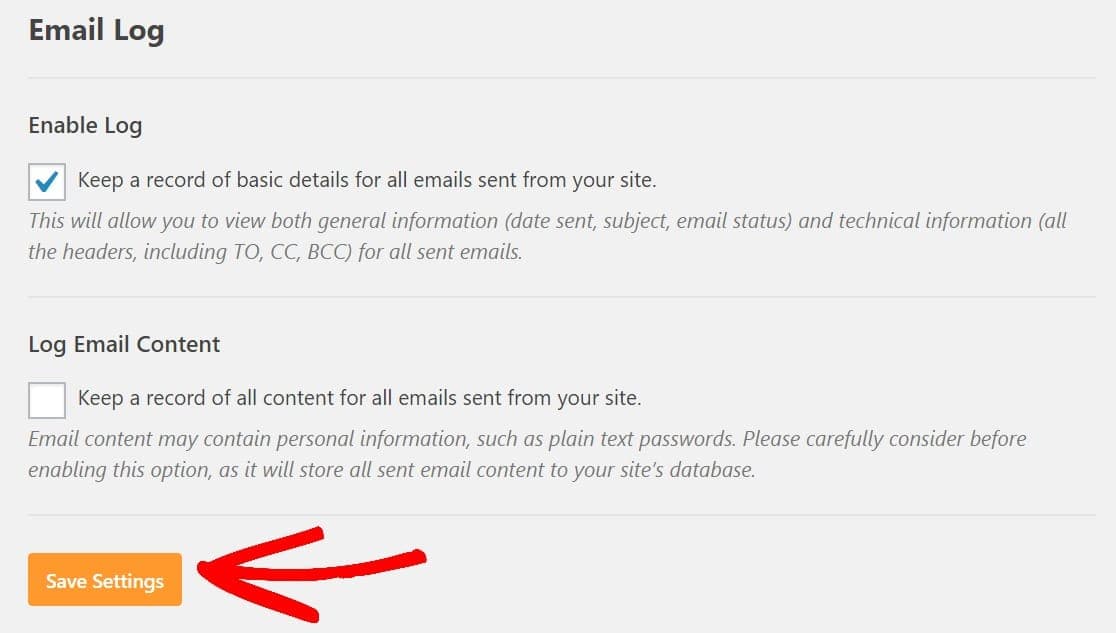
View all WordPress email logs
To view all the WordPress email logs on your site, go to WP Mail SMTP –> Email Log page from your WordPress admin menu.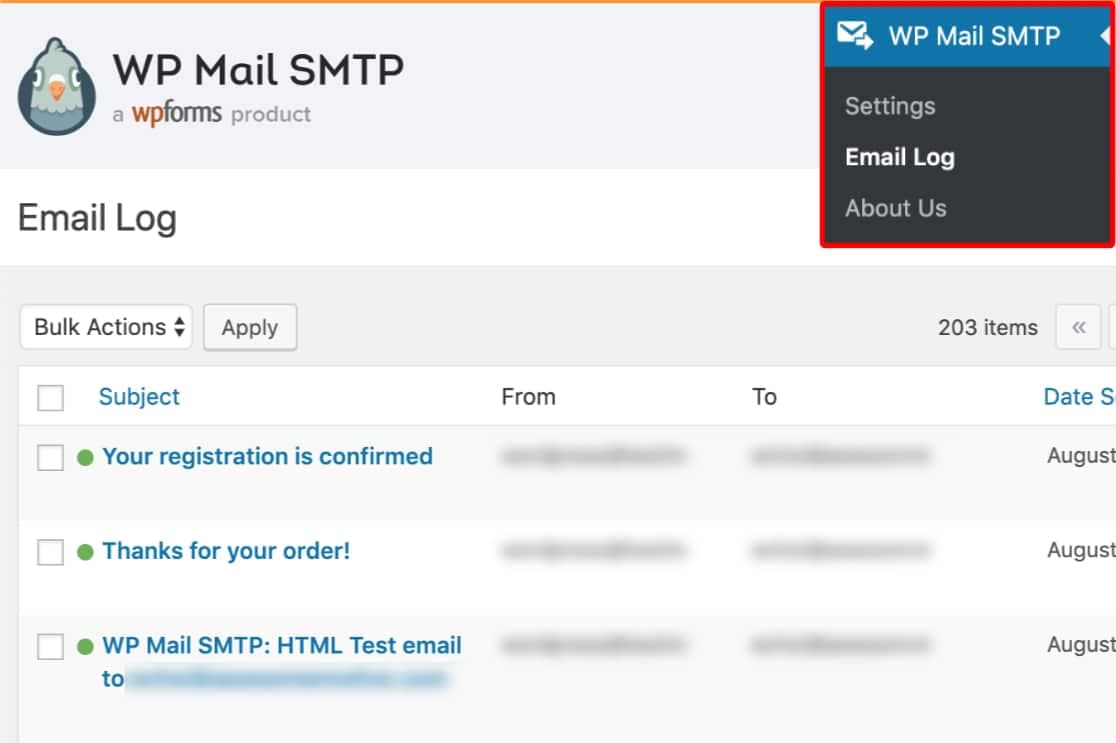
View individual email logs
To see more details about any specific email sent from your site, just click on the Subject line and a new page will display all the details you need.
That’s it, you have now successfully configured WordPress to log every email sent out from your website.
Conclusion
Did you find the article easy to read and follow the instructions? You can share your feedback in the comment section below outlining your experience along with what went well and what didn’t. This way, anyone else who stumbles upon this page might find it useful.