If you are one of those bloggers or businesses sending out periodic posts or promotional emails to your subscribers, you have come to the right place. Many people do not know what the right content is for their newsletters and fill it with junk which does not convert to profits. Just take a look at your previous email newsletter campaign carefully.
Did you notice your subject line? Is it interesting enough to make people feel intrigued to open and see what’s inside the emails? Is there a call to action (CTA) button or link for the readers? You might be spending hours of hard work on creating your emails but that does not matter now. All that matters is goals and conversion. You need to make the right pitch and increase your sales or whatever the goal you have set.
Your return on investment (ROI) in your email newsletters must be higher to keep it going without hurting your budget. The not-so-great concept you need to understand right now is – how to put your message and content in a way that prompts the most sales for your business.
There are three main steps to increase your sales by implementing split testing, and they are –
Table of Contents
1) Set up Sales Tracking
The very first thing you should ask yourself is, are you tracking the purchases your subscribers are making in response to each campaign. If you are not tracking the sales that are driven by your campaigns, you can easily do so by using ‘sales (or goals) tracking feature’.
Using AWeber Email Marketing tool, you can set up sales tracking once you have installed email web analytics on your site. Watch the video below to learn how to install email web analytics to your site.
It is really very simple to install. All you need to do is copy and paste some code into your web pages, just like how you have probably already done for your sign up forms.
Now, follow the step-by-step instructions to set up sales tracking –
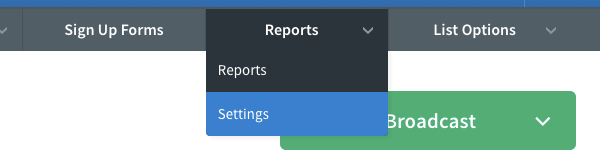
Step 1 – Login to your AWeber account and navigate to ‘Reports’ tab and click Settings.
Step 2 – Now, scroll down till you find the ‘Sale Tracking’ section. In the first field (New Goal Web Page), enter the URL (site address) you want the customers to be sent to after they place an order on your site.
![]()
NOTE: The URL you enter in this section should be the URL of a page that people are shown immediately after they place an order. This is because every hit to this page will be tracked as a sale.
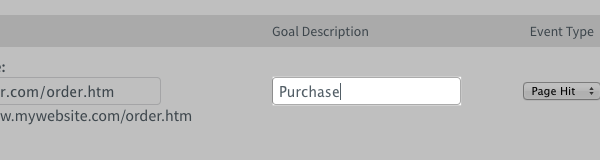
Step 3 – In the Goal Description box, you can add a note to your sale. For example, if you are offering more than one variant of the same product, you can track that here. Though filling it not compulsory, it will help you better understand what your subscribers are purchasing.
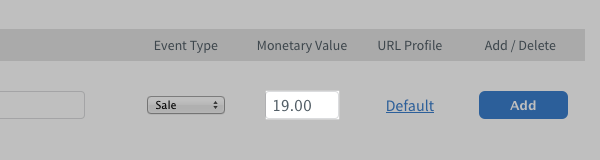
Step 4 – Under the Event Type section, you can select what you want to be tracked – whether you want to track a sale, page hit or other events. It is up to you to decide which one to track.
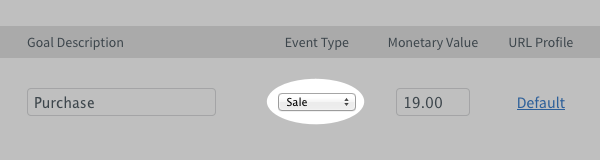
Step 5 – Under Monetary Value, just enter the amount (in USD) you think that is worth every conversion. Try to enter some positive value here so that your sales will show up on your QuickStats page.
If you do not know how to use the QuickStats page, watch this video –
Step 6 – We have nearly completed setting it up. Now, click on the ‘+’ button to start tracking your sales. From now onwards, you will be able to view the revenue you are collecting through your campaigns.

NOTE: If you want to set the value of your sales dynamically, you can do so using either query strings in the URL of the order confirmation page or with some additional JavaScript work. Advanced users take a look here.
2) Tweak the Promotional Campaigns
In this step, you will need to have two campaigns or broadcasts. For the first campaign, have your original campaign and for the second campaign create a new one. The ultimate goal over here is to test which campaign converts nicely and by how much percentage.
For a start, you can have a look at your call to action, text to image ratio, your preheader, newsletter format, images used, etc.
Your call to action must be catchy and readers should be tempted to click on that. Also, it is recommended to have a text to image ratio of 60% text and 40% images, with at least 3 images on the page so as to avoid spam filters.
Moreover, make sure your preheader – the tiny bit of text at the top of the email often called Trust Earning Text is clear. Add a ‘view in a browser’ link, a teaser on the subject line, as well as an opt-out link at the bottom. The format of a newsletter is very important for any business to become successful with their subscribers. Just to make sure you are not following the wrong format for your emails, read this post.
3) Split Test to find the Better Converting Design
In order to find which design is better converting for you (in terms of sales or traffic), you should make use of the broadcast split testing feature in your account. To create a blog broadcast, watch this video –
Broadcast split testing will send each version of your campaign to randomly selected, and equally sized audience so that you’ll be getting the most accurate results. Once the broadcasts are sent, you will be able to view the statistics of that campaign using the QuickStats feature.
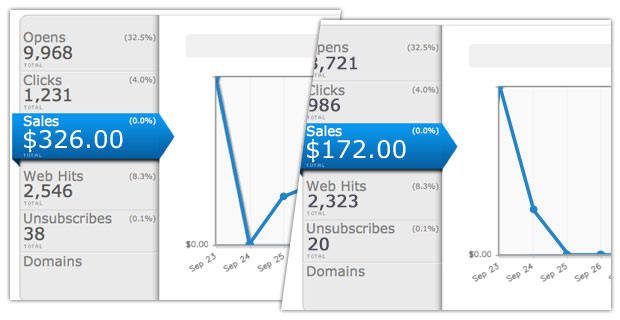
Soon you will be knowing which broadcast is performing better in terms of conversions, thanks to split testing.
Conclusion
Thus I hope you understood how to set up sales tracking for your email newsletters, tweak your newsletters’ appearance to make it more appealing to your subscribers, get more clicks to your call to action and split test to find which email campaign is performing better and converting well for you and your audience.
More than 100,000 digital marketers, professional bloggers, and businesses trust AWeber with their email marketing needs. Now, it is your time to try AWeber for 30-days [free trial]. Everyone needs an email marketing service for their site and it doesn’t matter if you are a pro digital marketer or just starting out with your blog. Read my article on why AWeber is the best email marketing platform for everyone – trust me, you will not regret.