
Quite sometime back, I had written why you must use a CDN (content delivery network) for your WordPress blog. Now, I’m back with a post on how to add your website to Cloudflare CDN’s forever free plan. Nowadays, search engines like Google and Bing are giving a higher preference to websites which load quickly rather than websites which take ages to load. If you don’t create good content, then you needn’t worry about this but if you are putting in much effort and crafting your content every time you publish something, you need to concentrate on your website’s performance too. With heavy competition in search engine results page (SERP), this extra boost to your page load speed can contribute to Google ranking your site higher than your competitors.
Even though you have already optimized your WordPress blog by enabling multiple layers of caching, compressing emoji, compressing images, boosting SEO, etc., nothing gives you the big push in search engine rankings like enabling a CDN for your WordPress blog. This is because CDNs can make your site load quickly no matter where your site visitors come from. Though there are many free and premium content delivery networks available out there, Cloudflare and KeyCDN are my favorites. Cloudflare is the best free CDN available out there while for large businesses and enterprise level solutions, KeyCDN is the best.
What Is Cloudflare And Why Are They Offering A Free CDN
Content delivery networks were actually premium solutions for large websites which helped website owners and businesses to offload their static assets like images, CSS and JavaScript to external servers across the globe which helped speed up delivery of content to the people visiting from international locations. For example, your server might be located in the US and there will be a delay in delivering the content from your server to someone visiting your website from Australia. But if you use a CDN, multiple copies of your website’s files will be saved across all the data centers of the content delivery network. These data centers are called as POP aka point-of-presence.
Cloudflare is powered by more than 120 data centers around the world covering the majority of North America, Latin America, and the Caribbean, Europe, Africa, Middle East, Asia, China, and Oceania. They have got you covered no matter where your visitors are coming from. Cloudflare has got a whole lot of other benefits too, like protecting your website from DDoS attacks and spam bots, global CDN for your content, free shared SSL certificates, Cloudflare apps with awesome features, website optimization tools, etc. The main reason why Cloudflare offers a free forever plan is that it’s CEO Matthew Prince felt that CDNs have nowadays become like a basic requirement for any website and that they cannot charge for something as basic and essential like that.
So, how do you enable Cloudflare free CDN for your WordPress blog? There are two ways of doing that. The first method is by enabling it from your hosting server’s cPanel (if it is supported) but this method is not recommended because of the complexities involved. The next method is by explicitly signing up for Cloudflare and adding your website from your Cloudflare dashboard (recommended).
How To Setup Cloudflare Free CDN From cPanel
Nowadays many web hosting companies like Rackspace, Bluehost, SiteGround, 1&1, A2 Hosting, HostGator, etc have partnered up Cloudflare to offer a free content delivery service for your websites. This is done by integrating Cloudflare controls within your hosting account’s cPanel, Plesk or any other control panel. With just one click, you can easily enable Cloudflare CDN for your website. But I don’t recommend this method because it requires your website to load and serve content over the ‘www’ version of your website. It doesn’t work well and sometimes can break things if your website does not use ‘www’ in front of its domain name. Anyway, with a word of caution here’s how you can enable Cloudflare from your hosting account’s control panel –
Enabling Cloudflare from your cPanel is fairly simple, just look for the Cloudflare logo under the ‘Advanced’ tab and click on it. If you are using SiteGround, you can find the Cloudflare logo under ‘Site Improvement Tools’.
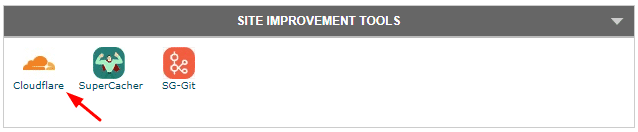
Note: You can only find the Cloudflare logo on your control panel only if your web host has tied up with Cloudflare to offer one-click setup. If you can’t find it, proceed with method 2.
Once you click on the Cloudflare logo, you will be presented with a list of websites where you want to enable Cloudflare. Don’t worry if you have got just one website, my account has got eleven websites hosted with SiteGround alone!
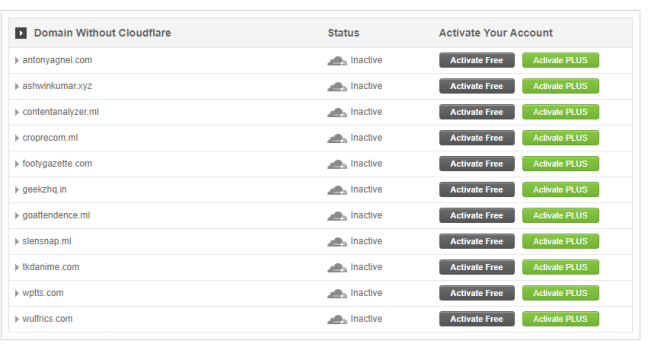 Now, click on the grayed out Cloudflare logo next to the website address where you want to activate Cloudflare.
If it is the first time you are using Cloudflare, an account will be created for you automatically with the registered email address stored in your hosting account’s personal information. You will be receiving confirmation to your email address whenever you add or remove any website from Cloudflare.

Now that your website has been added to Cloudflare, click on the ‘manage’ button to configure any additional setting you would want.
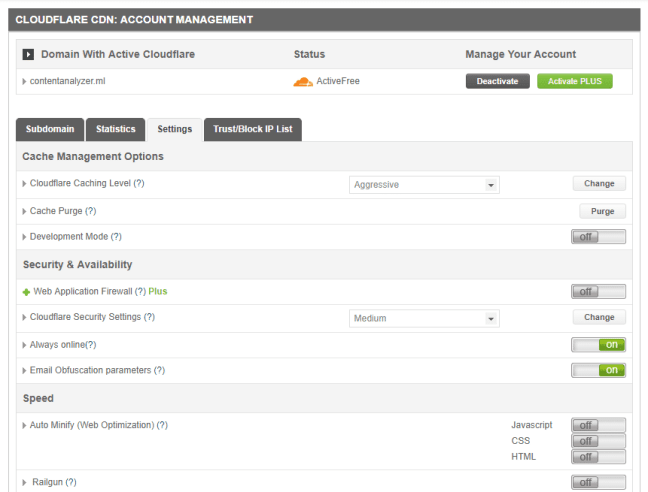
That’s it, your web host will now automatically configure the best Cloudflare settings for your WordPress blog and you needn’t worry about a single thing.
How To Setup Cloudflare CDN Manually (Recommended)
In case your web host doesn’t support Cloudflare or you would prefer to set up Cloudflare free CDN manually just like me, the below instructions are for you –
Step 1 – Go to Cloudflare.com and sign up for a free account (don’t forget to confirm your email address).
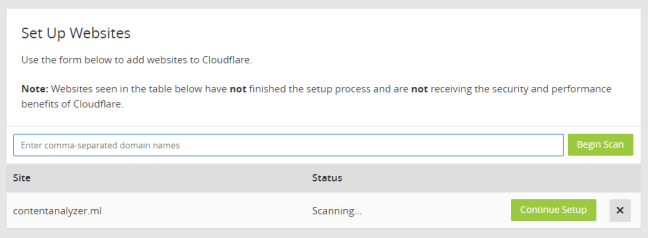
Step 2 – Log into your account and add your website address to Cloudflare. This can be done by entering your blog address and hitting the ‘Begin Scan’ button. Cloudflare will now scan for your domain’s DNS records so that you can easily make them pass through Cloudflare in the next step.
Step 3 – Now, click on the ‘Continue Setup’ button once the scan is finished. You will now be presented with a screen where all your domain records are displayed along with an option to enable Cloudflare for each of them.
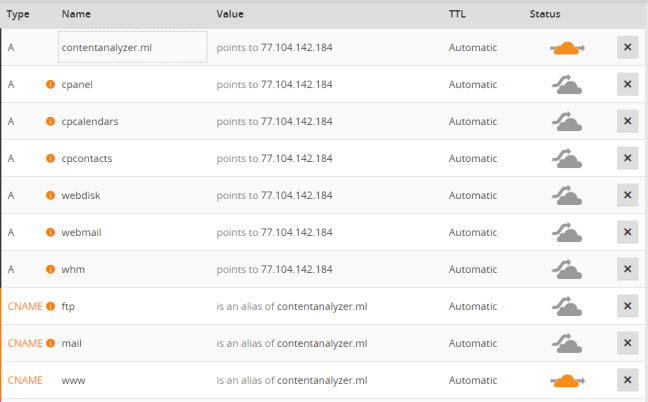
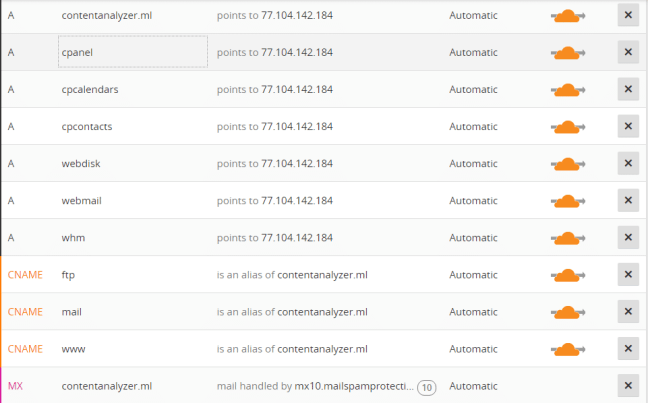
Step 4 – Orange cloud means that the website traffic will pass through Cloudflare’s servers, that is, it will be accelerated and protected by Cloudflare. I highly recommend you to enable Cloudflare for all your domain name records so that your website is fully protected against hackers and bots looking for security loopholes in your domain management system.
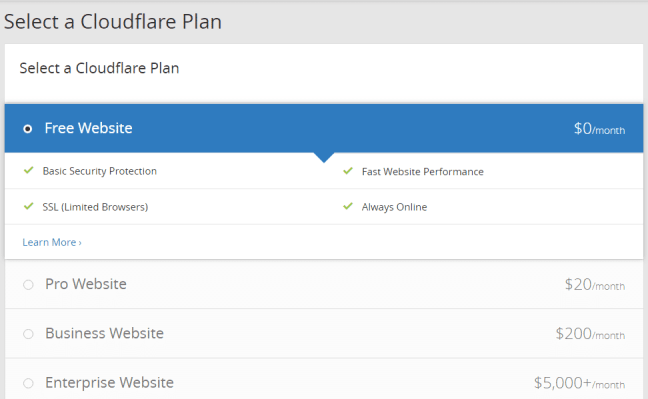
Step 5 – Now, scroll down to the bottom and click on the ‘Continue’ button. You will be prompted to choose a Cloudflare plan for your website. I chose the ‘Free Website’ plan but you can feel free to choose whichever plan you feel would best suit your website’s requirements.
Step 6 – Once you select a plan for your website, click ‘Continue’. Here, you will be asked to change the nameservers (NS records) for your domain name. This can easily be done by logging into your domain registrar account (GoDaddy, NameCheap, etc) and replacing the existing name server records for your domain name with that of Cloudflare’s name servers.
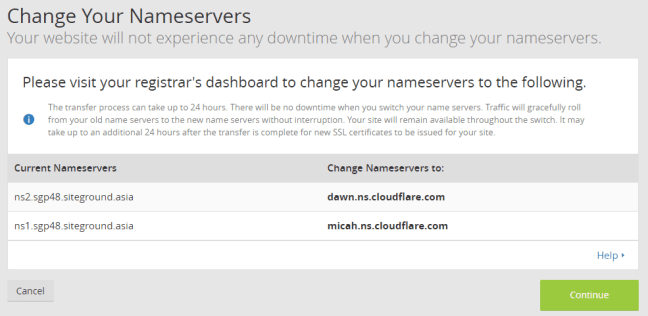
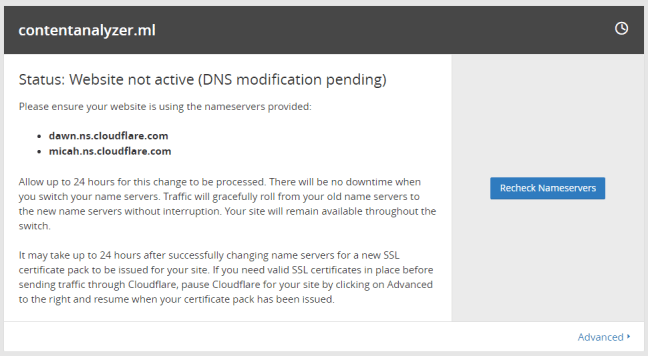
Step 7 – Once you have changed your nameservers to that of Cloudflare-provided name servers, click on the ‘Continue’ button. It shouldn’t take long before you can fully activate Cloudflare for your website. The best thing about Cloudflare is that there will be literally zero to no downtime when you make changes to your DNS records. Suppose Cloudflare isn’t activated yet, just wait for 15-30 minutes and click on the ‘Recheck Nameservers’ button. It should get activated by now.
Once your website is active on Cloudflare, you can start playing around with the settings. Cloudflare currently provides you with fifteen tabs.
- Under the ‘Overview’ tab, you can see an overview of your website on Cloudflare – its status, domain summary, Cloudflare subscription, etc.
- Under ‘Analytics’ you can view your website’s performance and security statistics such as the total number of requests through Cloudflare, total bandwidth used, number of unique visitors, and threats.
- Under ‘DNS’ you can manage your domain name’s DNS records, enable DNSSEC, CNAME flattening, etc.
- Under ‘Crypto’ you can manage your website’s SSL, edge certificates, origin certificates, always use HTTPS toggle, option to enable HSTS, authenticated origin pulls, opportunistic encryption, automatic HTTPS rewrites, etc.
- Under ‘Firewall’ you manage your website’s security level, challenge passage duration, IP Firewall, Web Application Firewall, etc.
- Under ‘Access’ you can manage access to your application. You can use this feature to protect access to internal resources like a staging site, JIRA or an internal company tool.
- Under ‘Speed’ you can manage performance settings for your website. It allows you to enable minification of HTML, CSS, and JavaScript files, setup RailGun (their best feature so far), activate accelerated mobile links, Brotli compression, etc.
- Under ‘Caching’ you can set your website’s caching level, browser cache expiration duration, etc.
- ‘Workers’ allow you to run JavaScript Service Workers in Cloudflare’s 120+ data centers around the world.
- You can use ‘Page Rules’ to control your Cloudflare settings based on any trigger URL.
- Enabling IPv6 compatibility, WebSockets support, IP geolocation, altering maximum upload size, etc can be easily done under the ‘Network’ tab.
- Using ‘Traffic’ you can easily control and manage your web traffic. You can use the tools under this tab to safeguard your service from disruptions with load balancing, automatic failover, geographic routing, and active health checks against your origin servers.
- ‘Customize’ features are only available if you are a Pro user. So, skip ahead to the next tab.
- I bet you will definitely fall in love with Cloudflare Apps. They have completely redesigned everything and have added a whole lot of useful apps to their collection. What more, most of them are completely free to use. I love their Google Analytics, Welcome Bar and Tweet This! applications.
- Finally, ‘Scrape Shield’ allows you to protect your website content by obfuscating email addresses, hiding specific content from suspicious visitors (Server-side Excludes) and protecting your images from being hotlinked. By preventing hotlinking, you will be able to save your server’s precious bandwidth usage every time someone tries to load an image from your server instead of using their own server to serve the images.
Cloudflare Plugin For WordPress
If you are using WordPress as your blogging platform, I would recommend you to further install the Cloudflare plugin from your WordPress dashboard. Using this plugin, you can prevent the redirect loop bug when you enable universal SSL, change Cloudflare settings from within your WordPress dashboard, view Cloudflare analytics, enable support for HTTP/2 Server Push, etc. You can grab your API keys from within your ‘My Profile‘ section on Cloudflare.
Ever since I enabled Cloudflare on my website, I have saved more than 10GB of bandwidth usage, served more than 250,000 SSL requests and blocked more than 200 attacks. The best thing about them is that they automatically update their spam protection list and block your website from the latest threats such as brute force attacks in real-time. If your blog is very popular and someone is trying to take it down by DDoS-ing your web server thus making your web host to ultimately suspend your website, worry not – Cloudflare is here to your rescue. With Cloudflare enabled, your website will hardly go down due to hackers getting access to your website. If you are using WordPress, I would highly suggest you follow the best WordPress security practices to keep your website even more secure.
Conclusion
Thus I hope that you found this post useful in helping you to easily setup Cloudflare for your website. If you are using Cloudflare already, do let me know in the comments section and share with us the best thing you like about Cloudflare. Oh, by the way, do me a favor and don’t forget to share this easy-to-understand Cloudflare tutorial with your blogger friends!

Discover more from Antony Agnel
Subscribe to get the latest posts sent to your email.

Thank you, Antony. This post has been a huge help for me.
You’re welcome Ramanan, glad you found my Cloudflare tutorial setup guide helpful!
You’re welcome Ramanan, glad you found my Cloudflare tutorial setup guide helpful!