
What Is Google Analytics And How Does It Work
When it comes to web analytics, Google Analytics is like the gold standard. Some of the key features of Google Analytics include the ability for you to keep track of your website’s analytics, find which of your online campaigns are performing well, which marketing strategies are bringing in more traffic to your website, and which country does most of your site visitors come from, audience demographics, track the number of visitors on your site in real-time, find what people are looking for on your site, view your top performing blog posts and pages, what devices, operating system and network your visitors are using to access your website, etc. In short, it helps you understand how your website is performing compared to industry standards. These are just some of the key benefits of using Google Analytics on your website.

To track your web analytics, Google Analytics (GA) uses a few lines of JavaScript code. Once you paste this code into your website’s header or footer section, it will start collecting data whenever someone visits your website and starts interacting with it.
Leverage Browser Caching Google Analytics
In this post, I will show you how you can add Google Analytics to WordPress by using a free plugin. Also, I will show you how you can host the Google Analytics code locally on your own server where WordPress is installed. By hosting Google Analytics code locally, you will be able to leverage browser caching for analytics.js, ga.js or gtag.js (depends on which version of analytics tracking code you’re using). Moreover, you will now be able to cache them and add expires header to your Google Analytics tracking script thereby optimizing your Google Analytics code for PageSpeed. This should solve one of the most frustrating problems you will ever face when you are optimizing your website for PageSpeed or YSlow using GTmetrix and Pingdom’s website speed & performance testing tools.
Since the analytics script is loaded from Google’s server and not from the server where your WordPress site is installed, it is impossible for you to add expires headers to it. Since you cannot add expires headers to the external scripts (GA code in our case), you cannot leverage browser caching. By implementing expires headers, you can set a predefined time period until which the browser needn’t fetch new information about the cached files from the web server. That is, if you are able to leverage browser caching for Google Analytics, your site visitors needn’t load the analytics script from Google’s server every time they refresh the page or visit a new post on your website.
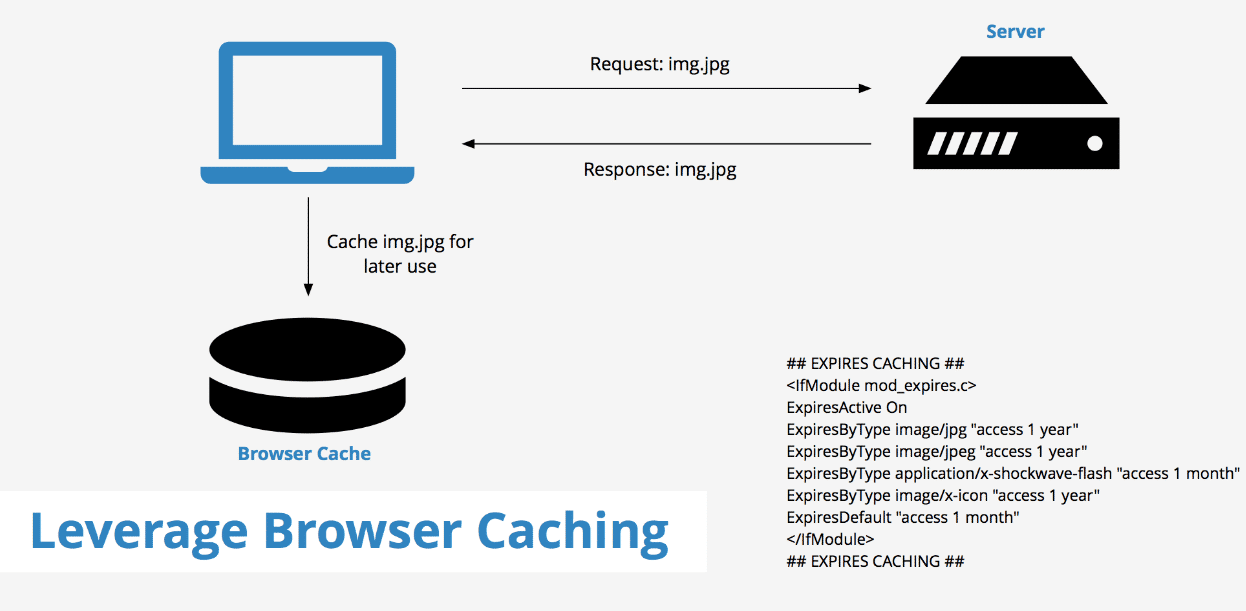
The above graphic by KeyCDN illustrates how leverage browser caching works, just assume the ‘img.jpg’ as our analytics tracking code (analytics.js) and it is a perfect example.
Drawbacks Of Hosting Google Analytics Locally
Though it is possible to host your Google Analytics tracking script locally, there is one major problem associated with it – you need to keep it updated. Google is known to update its analytics tracking code periodically and you cannot always grab the latest version of it and update it on your website manually. This can be fixed by syncing your copy of GA periodically with Google’s latest version by setting up a cron job. A cron job is nothing but a simple system command for scheduling a task in the future to be executed periodically after a certain interval (time gap). Though this solution works perfectly fine, it is not easy for everyone to set up and configure a cron job from their web hosting’s control panel.
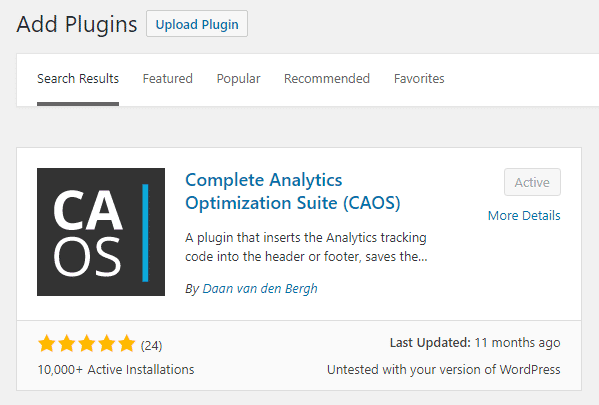
Here’s where the most recommended Google Analytics WordPress plugin comes in. If you haven’t guessed it already, it is none other than Complete Analytics Optimization Suite (CAOS) by Daan van den Bergh.
How to Fix Google Analytics Leverage Browser Caching Warning In WordPress
Complete Analytics Optimization Suite allows you to host your Google Analytics JavaScript file analytics.js locally and keep it updated for you using wp_cron() function. It also allows you to load analytics tracking code in the header or footer, use adjusted bounce rate and change enqueue order (the order in which it is loaded on your site).
Step 1
Go to your ‘Add New’ plugins page from your WordPress dashboard and search for ‘host analyticsjs local’. Now install and activate the CAOS WordPress plugin.
Step 2
Once you have activated the plugin, go to the ‘Optimize Analytics’ plugin settings page which can be found under your default WordPress ‘Settings’ page.

Step 3
(1) – Enter your Google Analytics tracking ID over here. You can find it by logging into your Google Analytics account and clicking on the ‘Property Settings’ under the ‘Admin’ section.
(2) – Choose the position of your tracking code. I recommend setting it to ‘Footer’ for improved performance. It can help you fix the ‘eliminate render-blocking JavaScript and CSS in above-the-fold content’ warning in WordPress. On the other hand, many SEO experts and webmasters want you to add the tracking code to your site’s header for better event tracking capabilities.
(3) – You can use an adjusted bounce rate if you would prefer, I have set it to 30 seconds. What we mean by adjusted bounce rate is that the tracking code will execute and record that event only after the user has spent 30 seconds or more on my website. You can learn more about why you should use an adjusted bounce rate from this excellent post at Moz.
(4) – I don’t recommend making any changes over here unless you want to change the order in which your GA tracking code should load. The default value is zero, which means the analytics tracking code will be the first script to load in the header or footer section of your site depending on which option you chose in (2).
(5) – I recommend you to check this box if you don’t use Google Analytics’s advertising features like remarketing, demographics, and interest reporting.
(6) – Check this box if it is required by law in your country to anonymize IP addresses collected using web analytics.
(7) – I don’t recommend checking this option because there’s no use in tracking how you are using your website. The main purpose of analytics is to track how your visitors are using your website.
(8) – Do nothing here.
Don’t forget to hit the ‘Save Changes’ button or else you’ll get nothing in your GA dashboard. If you have got a caching plugin installed on your WordPress site, it should now be able to cache and add expired headers to the GA analytics script like any other script present on your website. And if you are using a free CDN like Cloudflare on your blog, it will also be able to cache your GA tracking script. This will make your site load faster than usual with a slight increase in performance. Moreover, you can now get that perfect 100 in your Google PageSpeed Insights and YSlow scores.
Conclusion
Thus I hope that you found my post helpful in understanding how to add Google Analytics to WordPress without sacrificing your PageSpeed score and website performance by leveraging browser caching Google Analytics. By the way, do you know any other method to add Google Analytics to your WordPress site without compromising the site’s performance? If so, do let us know in the comments section below.
Discover more from Antony Agnel
Subscribe to get the latest posts sent to your email.

Hey~! I have nominated your blog for VERSATILE BLOGGER AWARD.
Thank you Charlie, from your nomination I can understand that you like my quality of writing and uniqueness of the subjects covered. But unfortunately I don’t do these awards thing, I hope you can understand my situation and excuse me for that. Good luck blogging.
Thank you Charlie, from your nomination I can understand that you like my quality of writing and uniqueness of the subjects covered. But unfortunately I don’t do these awards thing, I hope you can understand my situation and excuse me for that. Good luck blogging.
Thanks for these tips!
You’re welcome Michelle, I hope you found this article helpful.
You’re welcome Michelle, I hope you found this article helpful.
Awesome!
Thanks Yuu Lye, glad that you liked it.
Thanks Yuu Lye, glad that you liked it.
This is such great information! Thanks for such a detailed explanation! So glad to have you linking up with The Blogger’s Pit Stop! Roseann from This Autoimmune Life
You’re welcome Roseann, glad you found it useful. Hope it helped you improve your GTmetrix scores!
You’re welcome Roseann, glad you found it useful. Hope it helped you improve your GTmetrix scores!
Thank you very much. Happy to have stumbled upon your post after looking up for something easy to read on this topic.
I tried the plugin with recommended configs but it seems to have messed up with Jetpack comment box. Our readers were unable to login (using FB or Twitter login) to leave comments. Just had to deactivate it. What’s strange is that the comment features is broken even after removing CAOS. Not sure if we’ve isolated the problem properly.
Have you come across a similar plugin conflict using CAOS?
Hey there, forgive me for the late reply but I don’t think CAOS is responsible for messing up with Jetpack comments. It must be the work of some other WordPress plugin, most probably a caching or minification plugin. If it is still causing issues on your site, please try updating to the latest version. Or if you aren’t using CAOS on your site right now, I would recommend you to give it one more shot. I use it on every website I design/maintain and it hasn’t given me a problem till date.
Thank you very much. Happy to have stumbled upon your post after looking up for something easy to read on this topic.
I tried the plugin with recommended configs but it seems to have messed up with Jetpack comment box. Our readers were unable to login (using FB or Twitter login) to leave comments. Just had to deactivate it. What’s strange is that the comment features is broken even after removing CAOS. Not sure if we’ve isolated the problem properly.
Have you come across a similar plugin conflict using CAOS?
Appreaciate the post Antony. There is a dilemma though. I searched around, but could not find a solution for ecommerce websites. The plugin above does not work with enhanced ecommerce tracking… So there is a need for a solution with which one could :
a) host GA code locally
b) use enhanced ecommerce
Currently there is an option by using monster insights + enhanced ecommerce plugin. But with this option we can not host the GA code locally… only remotely. Do you have a solution for this perhaps?
Hello Rad, I’m not sure about how to achieve that. But according to Daan (the plugin developer), it is possible to combine CAOS for Analytics with the Pro version of MonsterInsights to host Google analytics locally and get the benefits of enhanced eCommerce tracking.
Hi Antony,
Thanks for Post. Very Useful Information.!
Maintaining two plugins besides my daily 9-to-5 job is a handful, so no. If you re looking for a way to host Google Webfonts locally; please install OMGF. For anything else, please follow the steps in this how-to.
Hi,
thank’s for this great article. It leaves me with a question. I actually use the GA Google Analytics Plugin on my site. Let’s assume I follow your steps above and host GA locally with the CAOS Plugin. Is there still any need for my GA-Plugin I’m actually using? I’m a litte confused…
Hello Andràs,
Since you have to enter your Google Analytics tracking ID in CAOS, it will now be acting as your default Google Analytics plugin. So, you can safely remove the other plugin from your site.