
If you’re using WPForms on your WordPress site to manage your contact forms and email newsletter forms but are not sure how to connect it with your Sendinblue account, I have got you covered. In this article, I will show you how you can add or remove users as subscribers from your Sendinblue email lists straight from your WordPress dashboard using the WPForms Sendinblue addon.
Note: Before following the below steps, you must have the WPForms plugin installed and activated on your site.
Table of Contents
How to connect WPForms and Sendinblue in WordPress
Step by step guide to connect WPForms with Sendinblue email marketing platform.
Total Time: 15 minutes
Install and activate Sendinblue addon
Once you have logged into your WordPress site, navigate to WPForms –> Addons from your WordPress dashboard and install the Sendinblue addon.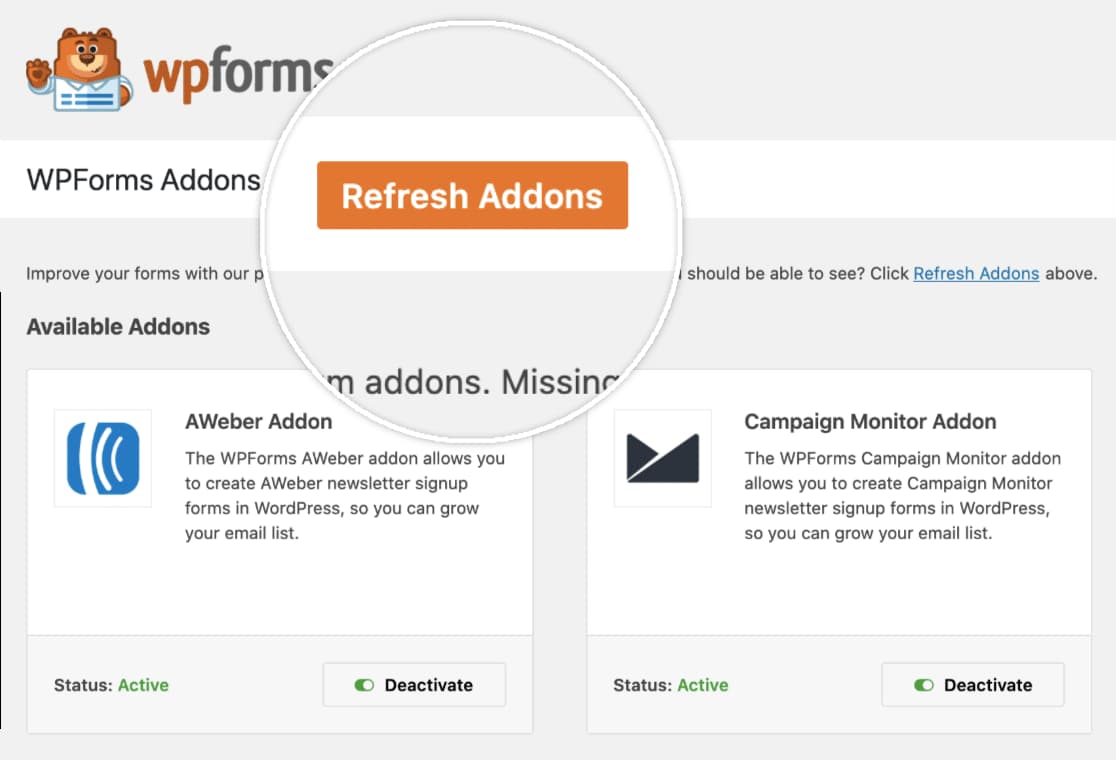
Go to WPForms integrations page
Then, open the WPForms Integrations page by going to WPForms –> Settings and clicking on the Integrations tab.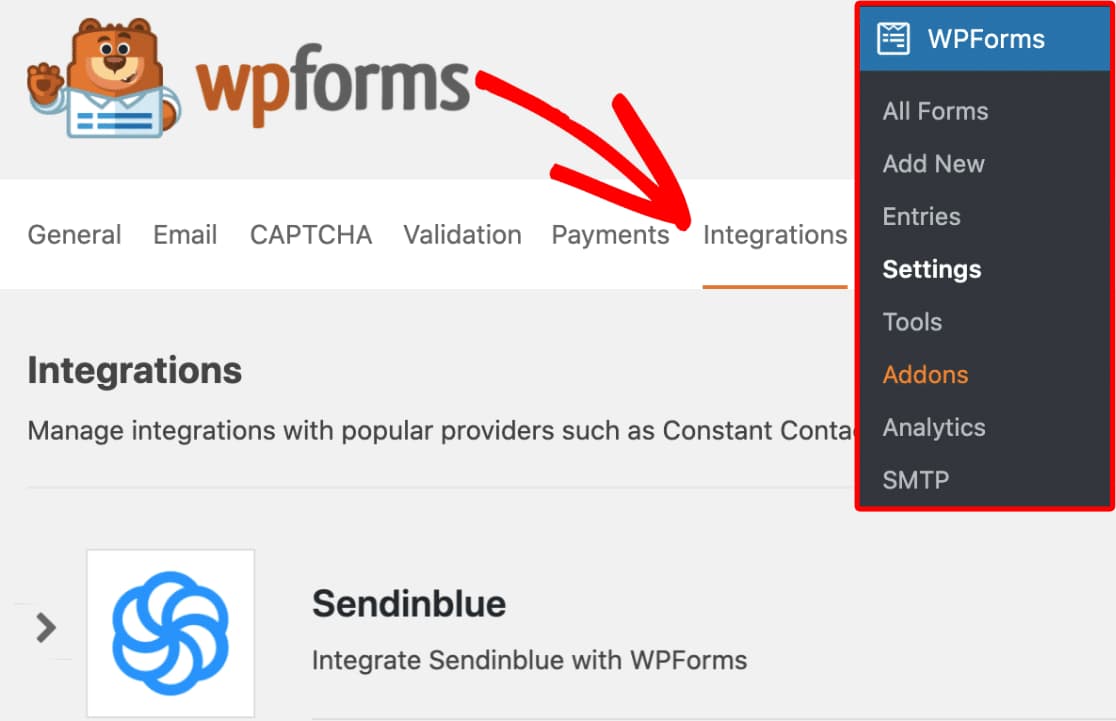
Add new account
After that, click on the Sendinblue option to expand its settings. Then, click on the Add New Account button. It will ask for your Sendinblue API key and account nickname.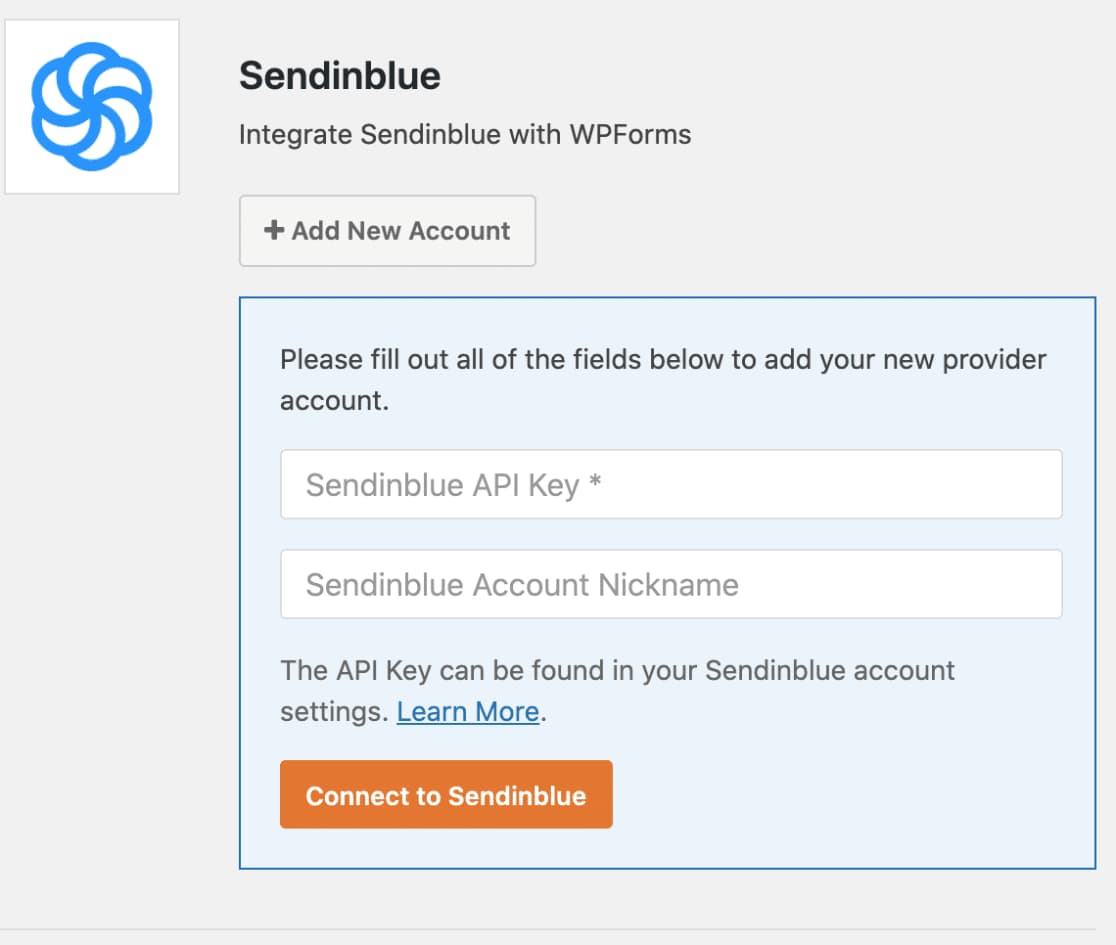
Find Sendinblue API key
If you aren’t aware of how to get your Sendinblue API key, just log in to your Sendinblue account and click on the menu present on the top right corner of the page, and select SMTP & API.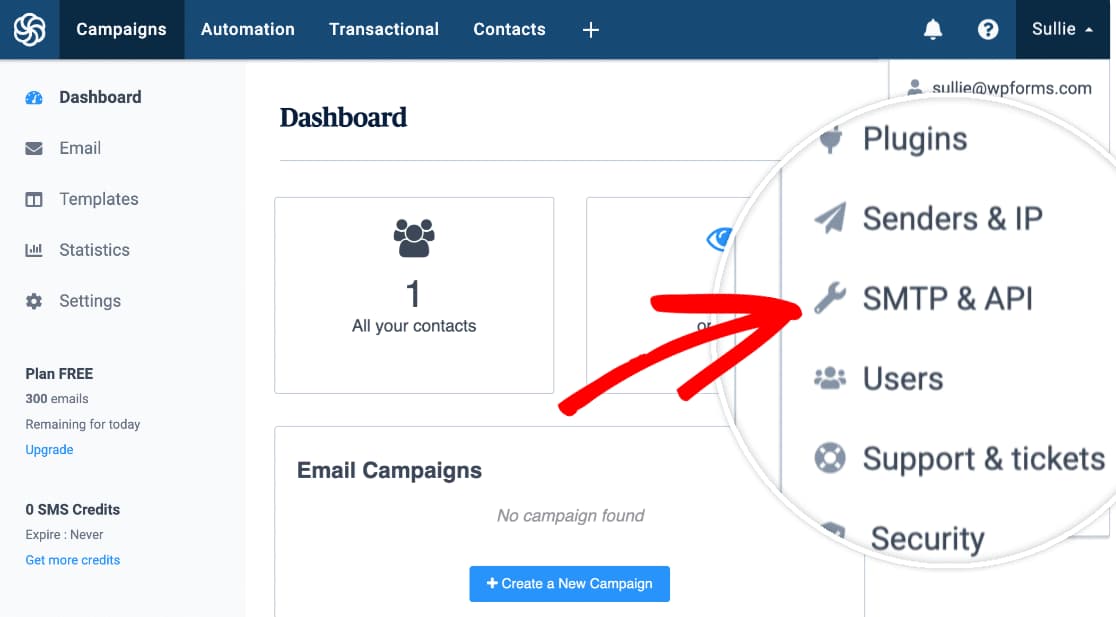
Connect to Sendinblue
Copy your API key from that page and go back to the WPForms Integrations page in Step 3. Paste the Sendinblue API key and add a nickname for your reference. You can give any value for the nickname field. Although it would be better to give something meaningful. Then, go ahead and click the Connect to Sendinblue button.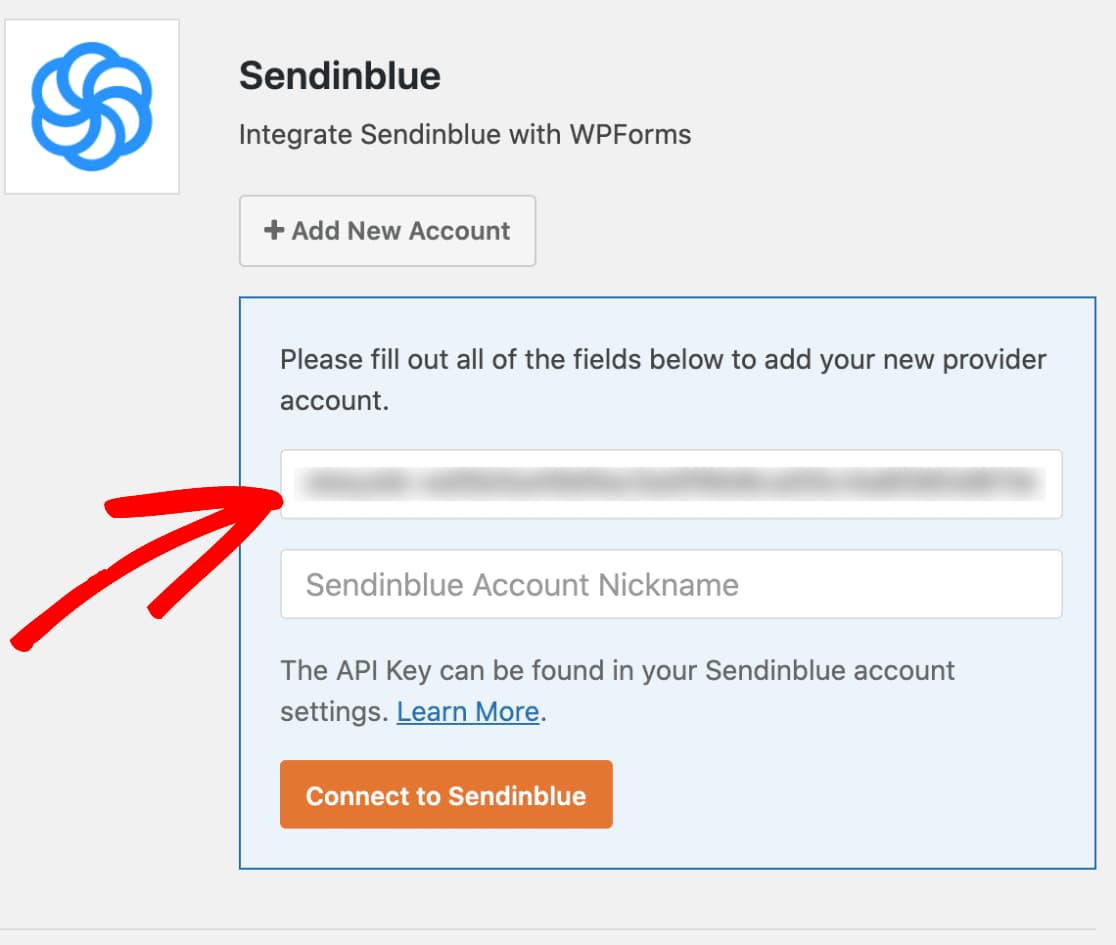
View Connection Status
WPForms will now try to establish a connection with Sendinblue and verify your API key. If everything went well, it would display the connection status as Connected. If not, you can try again with your proper API key. Make sure there are no extra spaces in front of or at the end of the API key.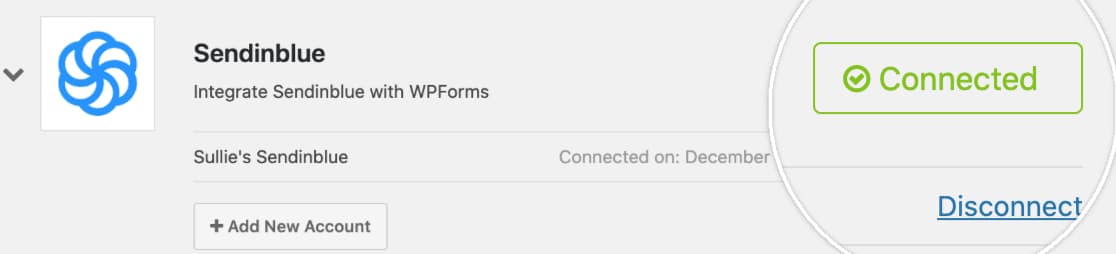
Add Sendinblue integration to your WordPress forms
Now that you have connected WPForms with your Sendinblue account, create a new form or open up an existing form (preferably your newsletter subscription form) to connect it with your email list. Then, click on the Marketing tab from the form builder screen and choose Sendinblue. After that, click on the Add New Connection button.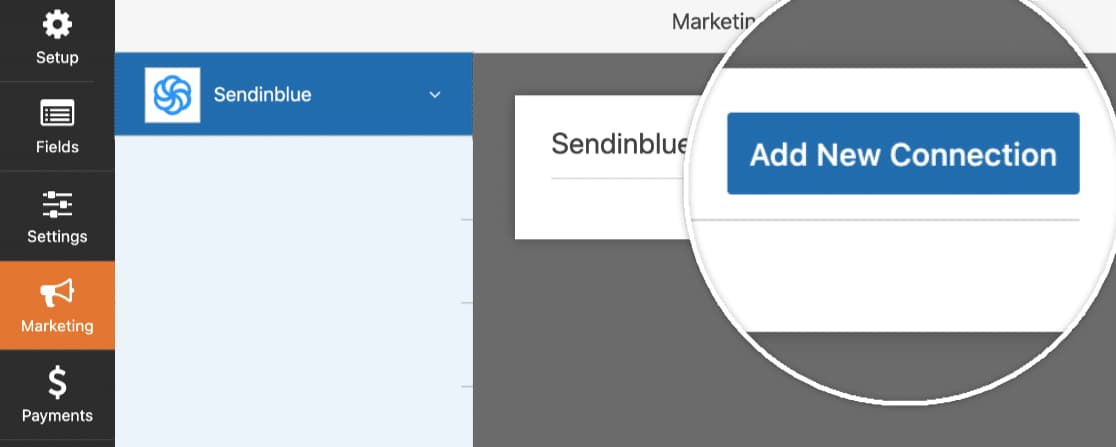
Provide connection nickname
After you click on the Add New Connection button in the above step, a popup overlay will be displayed asking for a connection nickname. You can give any name you want over here and click on OK.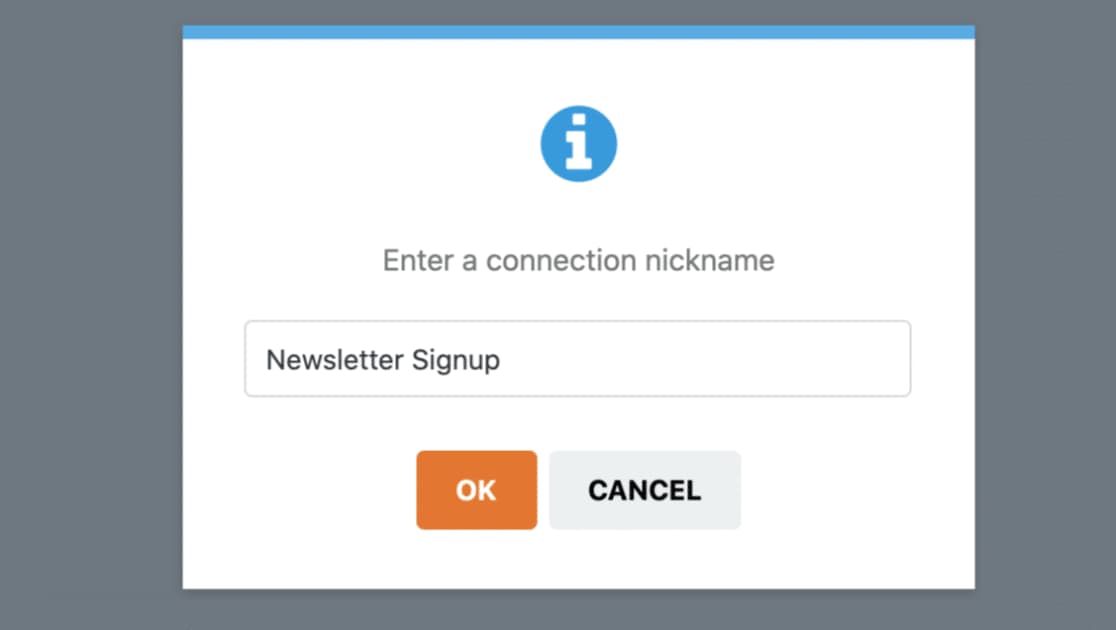
Provide connection details
You will now be asked to select the Sendinblue account (in case you have got multiple Sendinblue accounts connected with WPForms) and the action to be performed. The account you choose in this step will be used for performing the action you have chosen. Please note that you can also map custom fields you have created for your Sendinblue campaign in this step under the Custom Field Name section.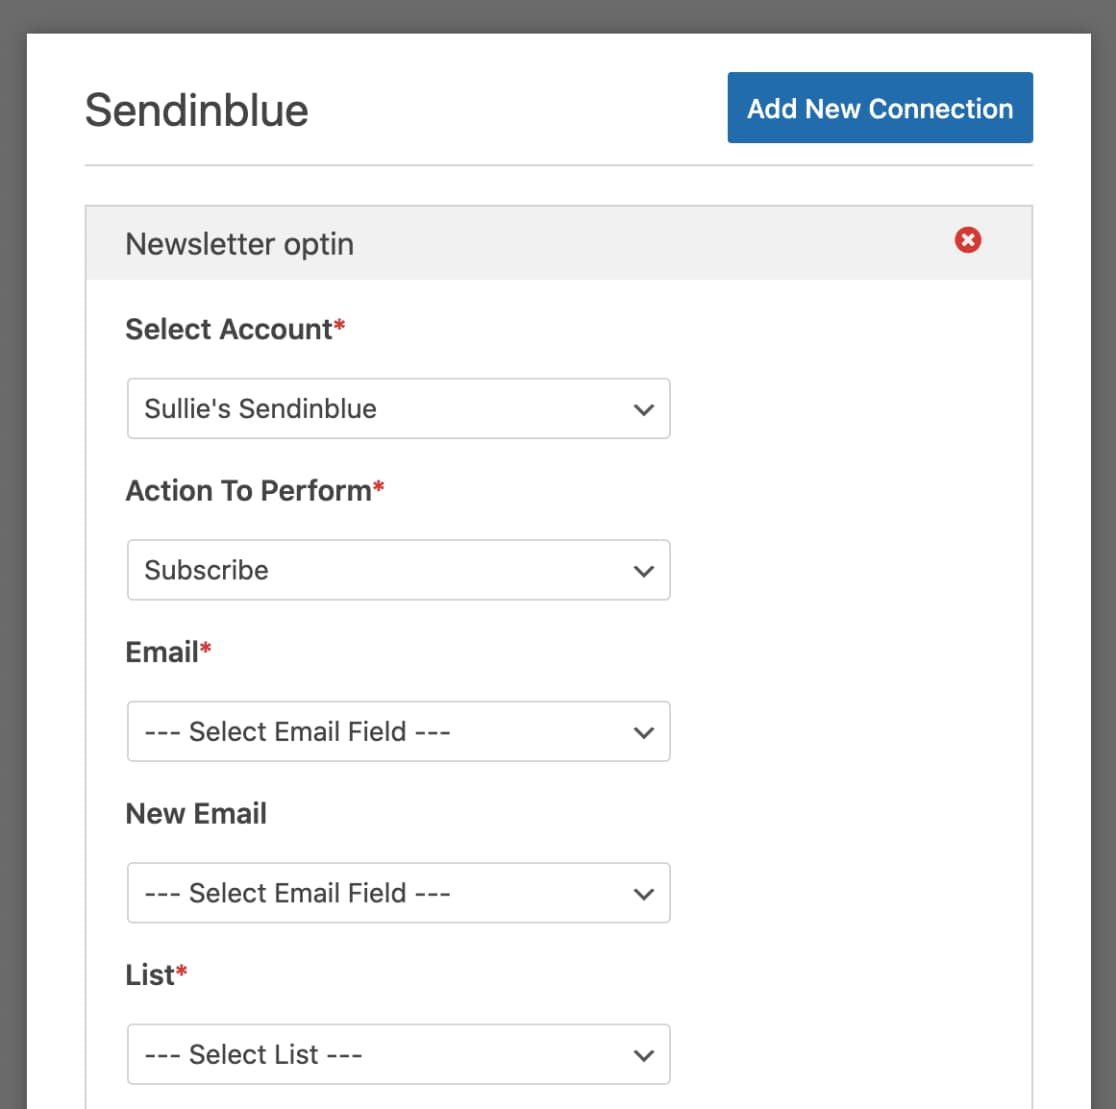
Save your settings
You have now completed all the steps to integrate Sendinblue fully with your WordPress forms created using WPForms. Just don’t forget to hit the Save button.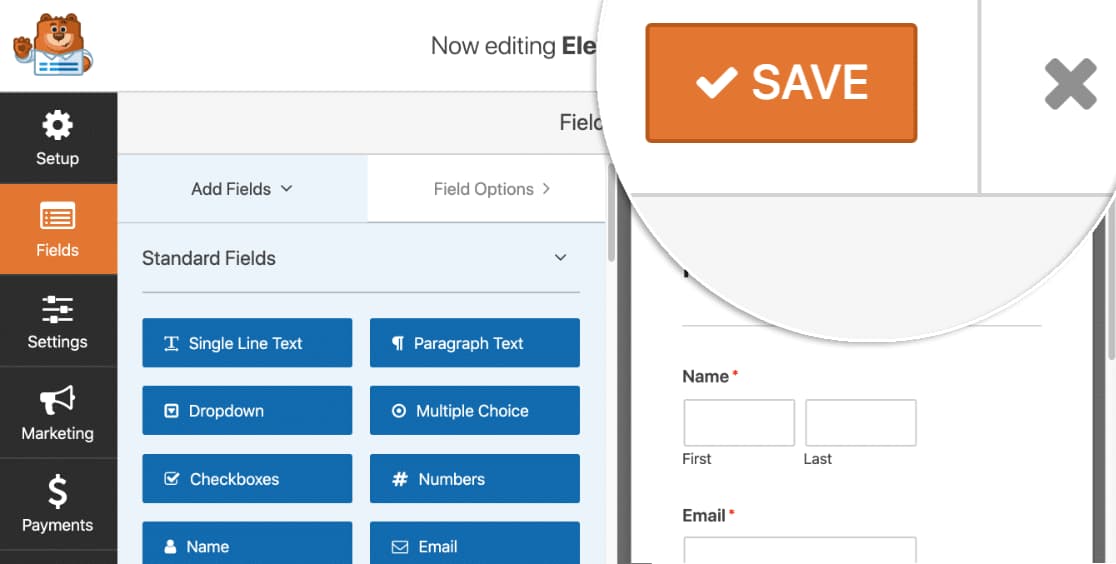
That’s it, you now know how to connect WPForms and Sendinblue in WordPress. You might also want to check out my other articles on WPForms.