Content locking is one of the most widely used techniques by many online publishers to monetize their content or generate high quality leads online. They frequently share valuable content and expect a part of their reads to convert into subscribers. But obviously they can’t keep creating free content right without expecting anything in return right? It’s not sustainable.
Before publishing a piece of content, a whole lot of research goes into that. Then, there’s time borrowed from work and free hours, proofreading it for errors, going through the content, again and again, to make it content more readable, sharing it, and hosting everything on a website.
As a blogger, I know how much work and money goes into running a successful website. Now, let’s see what content locking is, its benefits, and how you can enable content locking on your WordPress website without much trouble.
Table of Contents
What is content locking
Content locking is when someone ‘locks’ their content behind a ‘wall’. In most cases, you can unlock it by subscribing to their articles with your email address or by sharing it on a social media website. Sometimes, they can be paywalled too – that is, you have to pay for a subscription to unlock them (like most news websites and online magazines).
In general, publishers either lock an interesting piece of content (and share other articles freely on their site) or share all their content freely but make only the first few paragraphs visible giving the readers a preview of what to expect if they choose to unlock it. And if the reader is still interested and trusts that it might add value to whatever they are doing, they can unlock it by subscribing to the website or paying for a subscription.
What are the benefits of content locking
Some of the popular benefits of content locking are –
- Grow your email list when people subscribe to read your content
- Boost your social signals when people share or like it on social media to unlock your content
- Generate high-quality leads as people who are only really interested will unlock your content in the first place
- Segment readers into different lists and send them targeted newsletters
How to add content locking in WordPress
In this tutorial, I will be using OptinMonster to show you how to lock the content in WordPress. The reason why I’m using OptinMonster is that it is unlike any other lead generation plugin for WordPress – it is lightweight, easy to use, and extremely powerful.
Also, OptinMonster is one of the most popular and trusted WordPress lead generation plugins out there. But unfortunately, it’s not available for free – it’s a premium plugin but is quite affordable. To use this feature, you need to be on their Plus or Pro plan.
Other than that, you can use it for creating spin-to-win lucky wheels, exit-intent popups, attention activation, split testing, and more. You can read more about it in my OptinMonster review.
Step-by-step guide to enable content locking on your WordPress site –
Total Time: 20 minutes
Install and activate OptinMonster
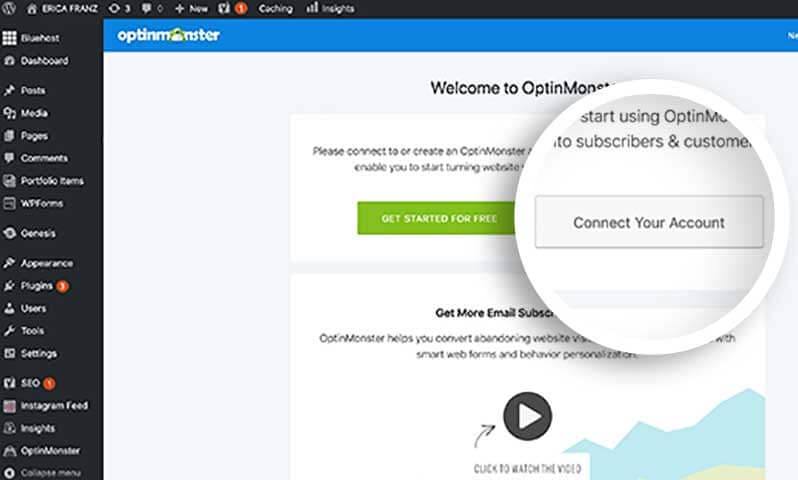
Install the OptinMonster plugin from the WordPress repository and connect it to your OptinMonster account having an active license of the Plus or the Pro version. Note that you can’t use OptinMonster features on your site without connecting it.
Create an ‘After post / Inline’ optin
Once you have activated OptinMonster on your site, create a new campaign from the OptinMonster site and choose After post/Inline as the optin type. You will now be displayed a set of prebuilt readymade templates. Choose one.
Customize the optin
You will now be taken to the optin builder screen from where you can customize the optin text, colors, images, fonts, and other settings.
Turn on content blocking
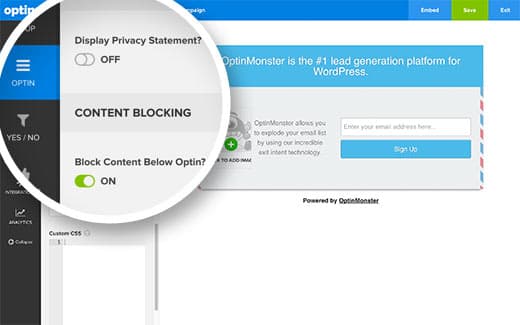
Turn on content blocking by clicking on the Optin Menu and scrolling down to the content blocking section. From here, you can toggle on or off the content blocking feature.
.
Choose content blocking method
You can now choose how your content needs to be locked from the Content Blocking Method dropdown – obfuscation blurs the content whereas removal totally removes the content. Make sure the Success Cookie Duration is set to zero.
Connect email marketing service
Now, go through the Integration setting to connect OptinMonster with your email marketing platform. Don’t forget to save your changes.
Enable optin on your site
Go back to your WordPress site and click on the OptinMonster menu. From here, click on the refresh button to load your latest optins from their server. Then, click on the edit optout settings link below your option and check the box that says Enable optin on site. Finally, save the changes.
Implement content locking
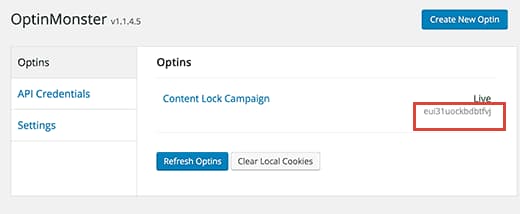
Go back to the optins page by clicking on the OptinMonster menu from your WordPress dashboard and copy the optin ID. Then, go to any page where you want to implement content locking and edit the page. Paste the OptinMonster shortcode on that page exactly on the line from where you want the content to be locked – [optin-monster-shortcode id=”abcxyzghidef”]. Replace the dummy ID with your optin’s actual ID. Finally, save and publish or update the page.
That’s it, you have now successfully implemented content locking on your WordPress site. If you want to implement content locking on all your posts automatically, use a shortcode or ad code inserter plugin and paste your shortcode in that place. It will automatically lock your content on all your posts. So, what are you waiting for?
