
We have seen so many eCommerce stores and online shopping portals display a countdown timer whenever there’s a special sale going on or there’s a limited time offer. Ever wondered why they use these countdown timers to create a sense of urgency in us? Well, it’s because it just works. And it has historically helped online store owners boost their sales numbers – especially during the holiday season.
Now, if you are looking for a way to add a countdown timer to your WordPress site, I have got you covered. In this article, I will show you how to create a countdown timer using OptinMonster and boost your sales during the next promotion on your WordPress site. Halloween is near and so is Black Friday and Cyber Monday. So, get ready! 🎃
Table of Contents
Why OptinMonster
OptinMonster is simply one of the best lead generation plugins available out there for WordPress and it comes from the same people behind other popular WordPress plugins like WPForms and MonsterInsights. They are known for the quality of the code that goes in their plugins, huge user base, and timely customer support. I have already covered all about it in my OptinMonster review.
Once you have checked out my review, you can have a look at its features below.
How to display a countdown timer in WordPress
A step-by-step guide to set up a countdown timer in WordPress.
NOTE: Because of the way how OptinMonster works, you can’t create your campaigns directly from your WordPress dashboard. You need to create it from your OptinMonster account and it will automatically be loaded to your WordPress site using their official WordPress connector plugin. It acts as a connector between your site and their server.
Total Time: 15 minutes
Create new campaign
Login to your OptinMonster account and click on the Create Campaign button to create a new campaign. From here, you have to choose the Floating Bar as your campaign type.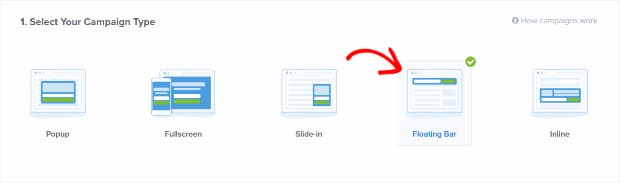
Select countdown template
Then, select the Countdown template for use in our campaign.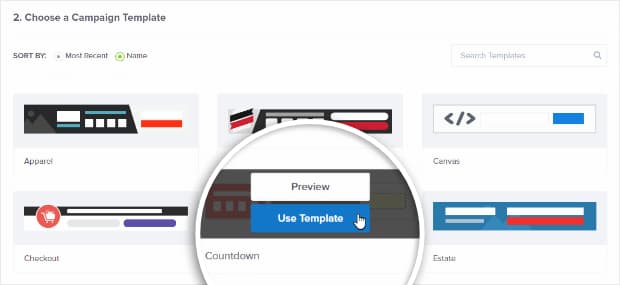
Name your campaign
Next, give your campaign a name, select the website where you will be displaying the countdown timer popup, and click on the Start Building button.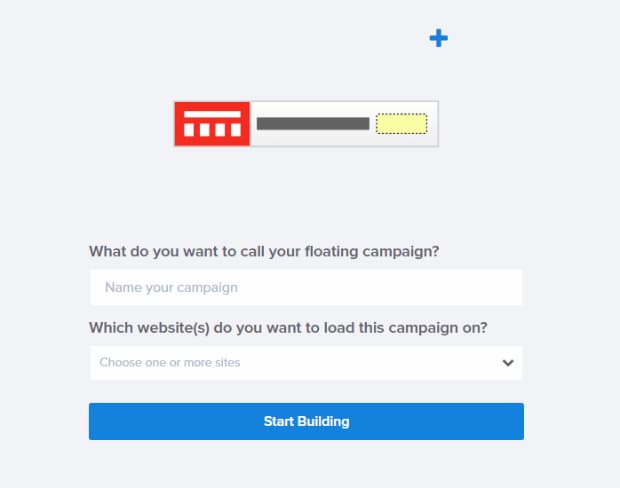
Save campaign
Don’t forget to keep saving your campaign as and when you make changes.
Modify display settings
By default, the countdown timer is displayed at the bottom of the screen. If you want it to be displayed at the top of the screen, click on Display Settings and toggle on the Load Floating Bar at Top of Page.
Set timer as static
To prevent the timer from displaying different countdown time to different site visitors, we need to make it static. You can do it by clicking on the countdown timer from the preview screen to see the available options and then changing the Type to Static. Also, you can go ahead and modify the end date and time for your campaign from the same screen. All changes will be instantly reflected in the preview. Don’t forget to save it though.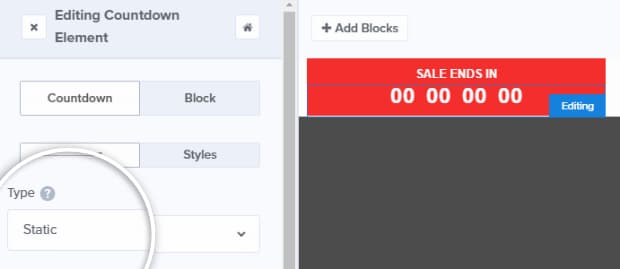
Customize your campaign appearance
You can now start customizing the floating bar to look like what you have got in your mind. Just make sure that the colors and contrast go well with your site and theme. You can even change the text copy from the same page by clicking on the desired text section from the preview.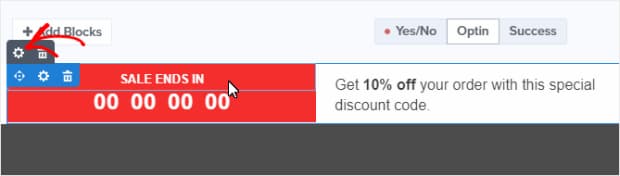
Customize success view
To display the coupon code or any other message after the user submits their email address depending on your campaign, click on the Success tab, and customize the success view.
Connect your campaign to your email list
But before you can start collecting the email addresses and add them to your list, you need to connect your campaign to an email marketing platform of your choice. You can do it by clicking on the Integrations tab and following the on-screen instructions. OptinMonster supports almost all of the major email marketing service providers out there.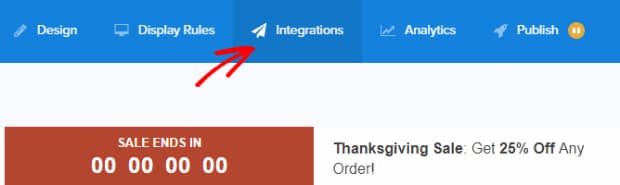
Configure display rules
To configure the floating bar to be displayed on or before a certain date, click on the Display Rules tab and add the rule you want to be applied for your campaign. You can also configure where the floating bar is displayed. Feel free to explore the available options and tweak it to suit your needs.
Make your campaign live
Now that you have configured your countdown timer as per your requirements, it’s time to publish these changes and make it go live on your site. Click on the Publish tab and toggle on the Status to Live. Then, save the campaign one last time.
That’s it, you have successfully created a countdown timer in WordPress for your upcoming sale. Keep up the good work!