
Salesforce is inarguably the best Customer Relationship Management (CRM) software out there. It easily beats the competition due to its ease of use, features, and support. It is used by large corporations and small businesses alike. And some of them might be having websites that run on WordPress to generate leads online, provide customer support, or even as just a home page on the internet.
Table of Contents
Problem with moving data from WordPress to Salesforce
What happens when these business owners want to move data from WordPress to Salesforce? They either hire someone to copy all the data manually from WordPress and paste it to Salesforce or they can just automate it.
For small agencies, the manual option might help. But for large companies spending thousands of dollars on ads and other promotions for lead generation, their websites can easily rack up millions of page views each month, and things can easily get out of hand. You can’t rely on one person to do it all, you will need a whole team for that. And copying data from WordPress to Salesforce is not as easy and straightforward as it sounds – people who have used Salesforce would agree with that. Instead of doing all this, you can automate it.
Well, until now there was not an easy to use, out of the box option for exporting contact form entries or other form entries from WordPress to Salesforce. Zapier helped a bit with the integration part but that’s another story.
Now, you can automatically export (sync) WordPress form entries right from your website to your Salesforce org using WPForms. Yes, that’s right – WPForms has now introduced a new addon that can considerably lessen the work you do by fully automating it. It can also help you save a lot of time and money in the long run.
WPForms Salesforce Add-on Features
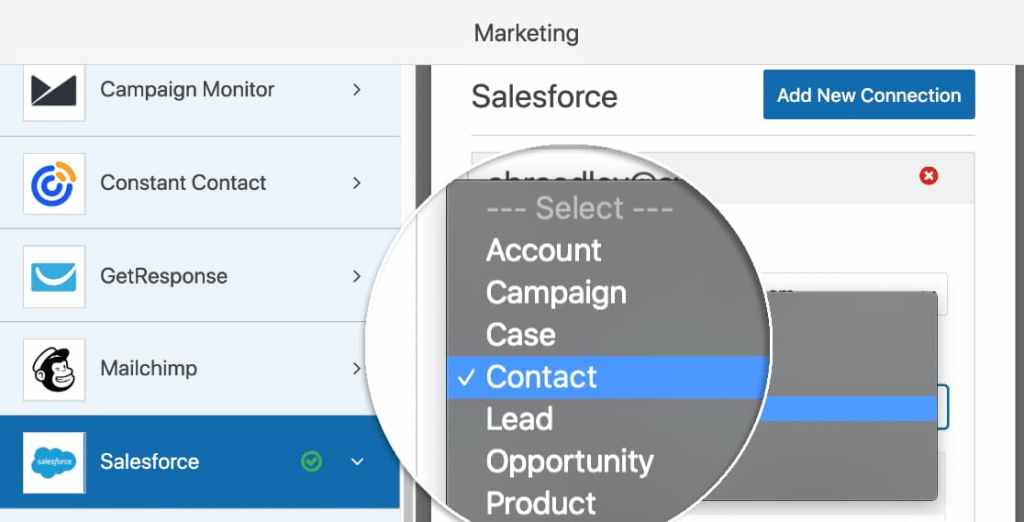
Once you have installed WPForms and its Salesforce addon on your site, you can configure what type of Salesforce object your form entries must create in your org. In general, it is best to save new entries as Leads in your Salesforce org if you are primarily using your website for lead generation. If it is a quote/estimation request form, you can use the Opportunity object. Or, if it’s a new user registration, you can add it to the Account object.
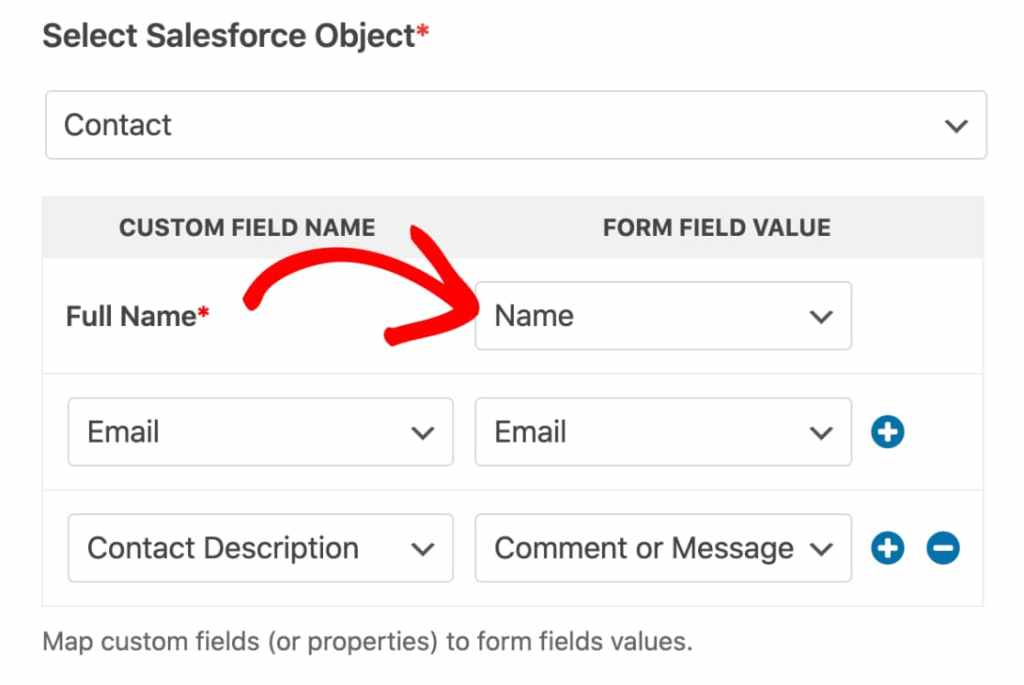
Once you have selected which object you are going to use for each form, you half your work is done. The next step is to map the fields in your form to the fields present in the Salesforce object.
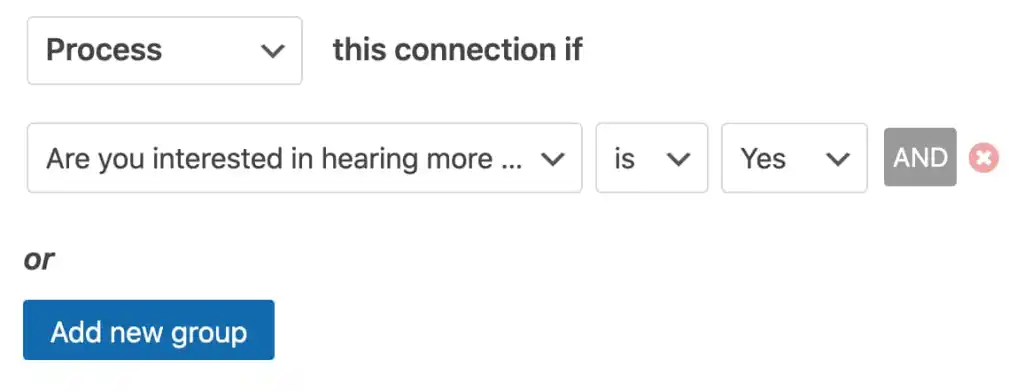
And the best thing about this integration is, WPForms allows you to configure conditional logic based on which it is decided whether to add the entry to your Salesforce org or not. You can use it to filter out entries that do not add value to your business.
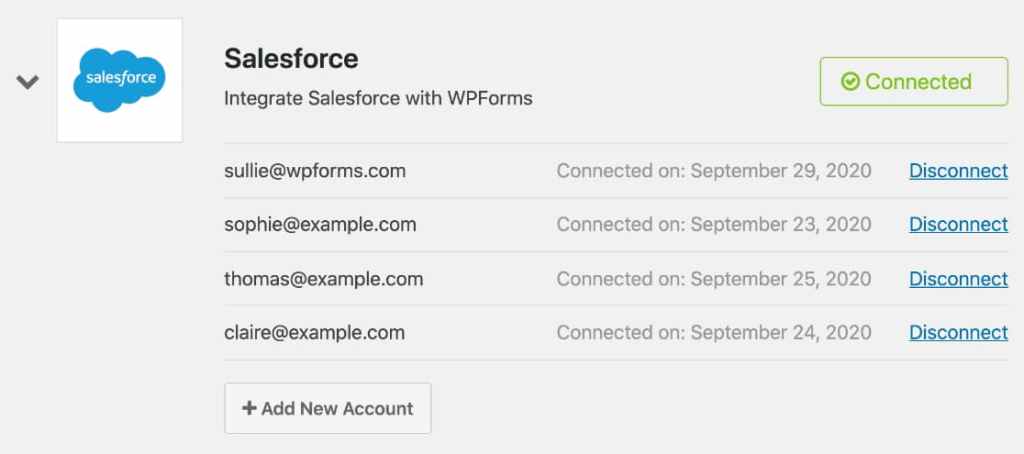
And there’s one more thing I’d like to add here. WPForms allows you to add all your forms to the same org and all your Salesforce orgs to one website. It’s up to you – you can use it any way to meet your business requirements.
Since all this is made possible using the official Salesforce API, your data is secure.
Also, note that you will be needing a WPForms Elite license to use these Salesforce features on your WordPress site.
How to export WordPress form entries automatically from WordPress to Salesforce
A step-by-step guide to export WordPress form entries automatically to Salesforce objects and map them to the correct fields –
Total Time: 30 minutes
Install and activate WPForms
Install and activate WPForms on your WordPress site. Then, install and activate the Salesforce add-on. Make sure you are on the Elite plan.![]()
Login to Salesforce account
Login to your Salesforce account and switch to Salesforce Classic.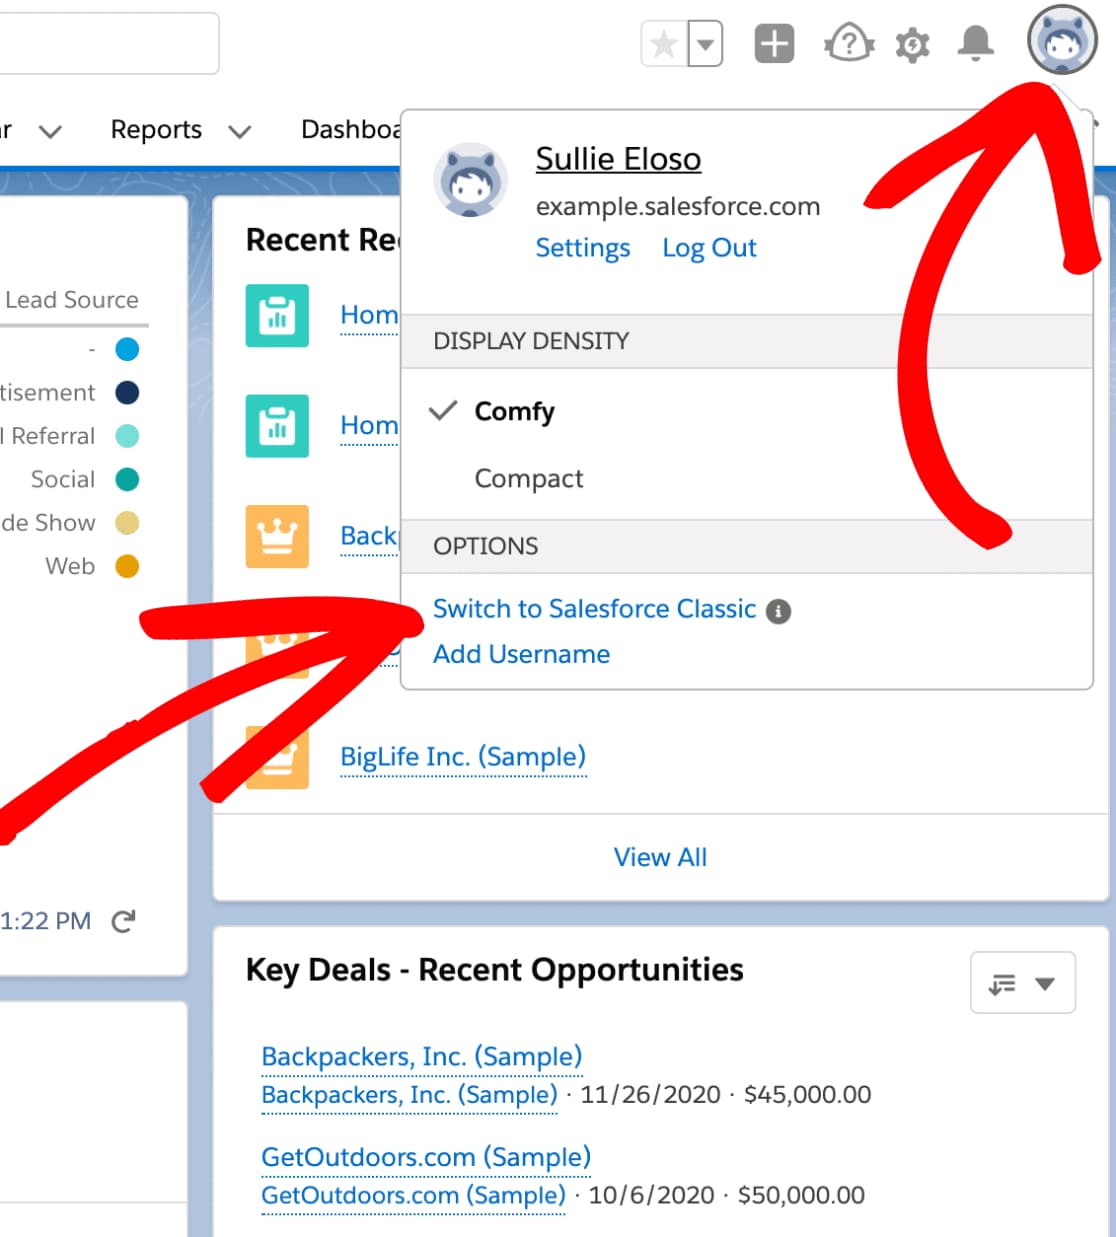
Go to Salesforce Setup
Open up the Salesforce Setup page.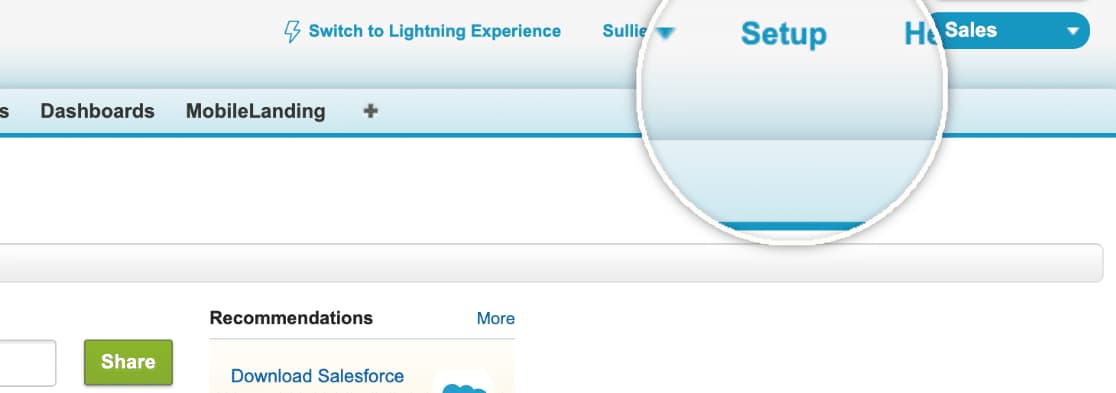
Search for Apps
Search for ‘apps’ in the Salesforce quick find box and click on the option under Build –> Create –> Apps.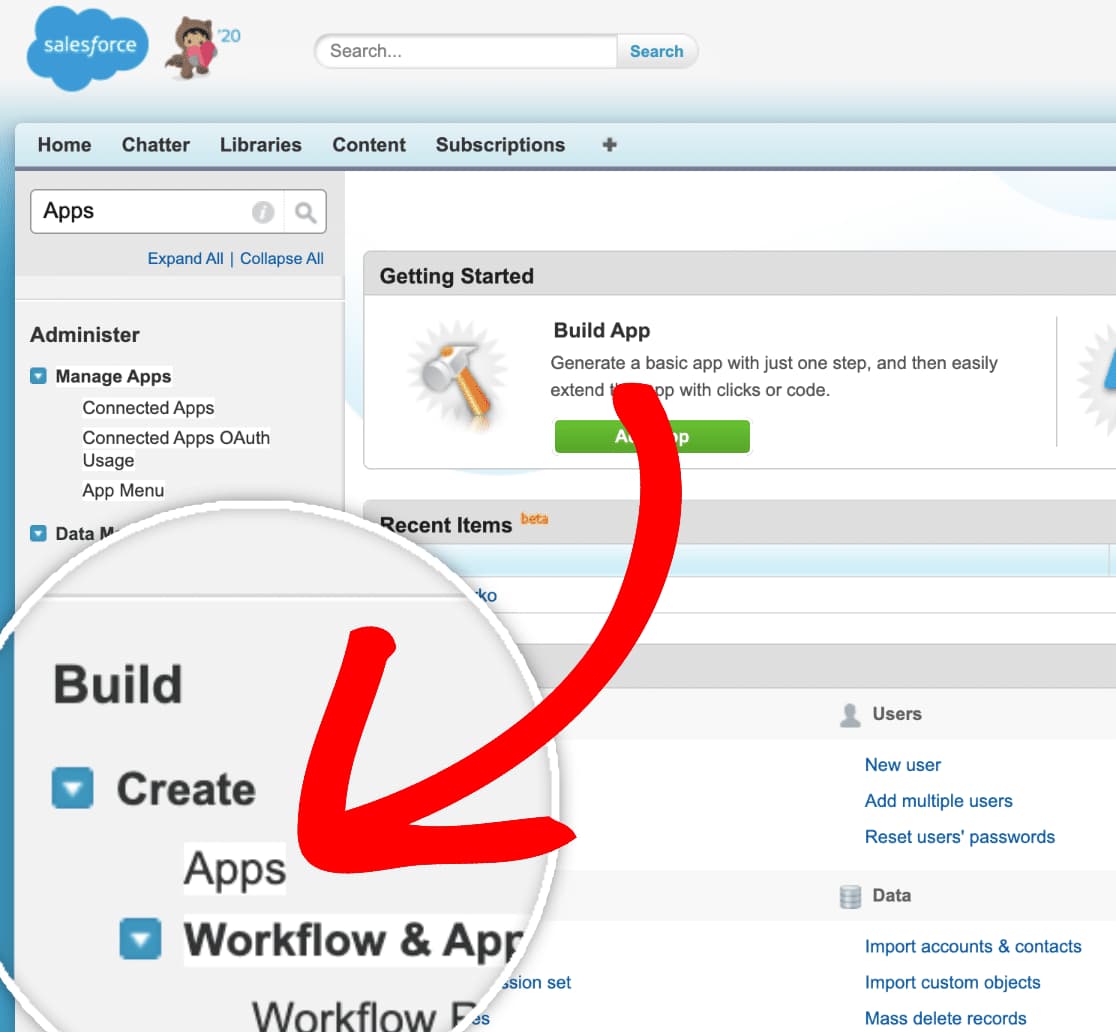
Create new Salesforce app
Once you are on the Salesforce Apps page, scroll down to the Connected Apps section and click on the New button.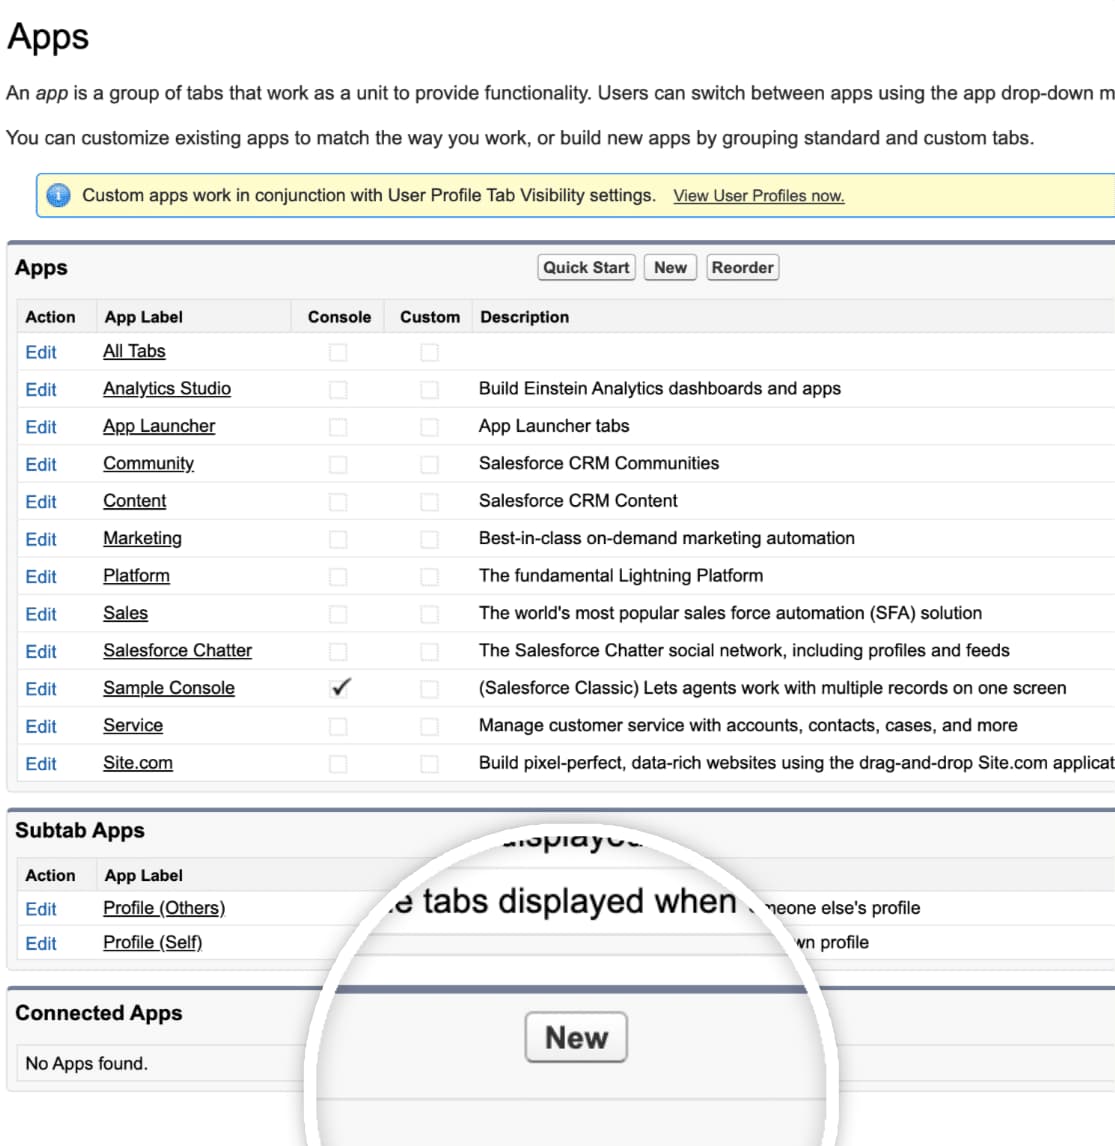
Fill out the app details
A form will now be displayed to you that you need to fill about the app. Fill in all the required information and mandatory fields.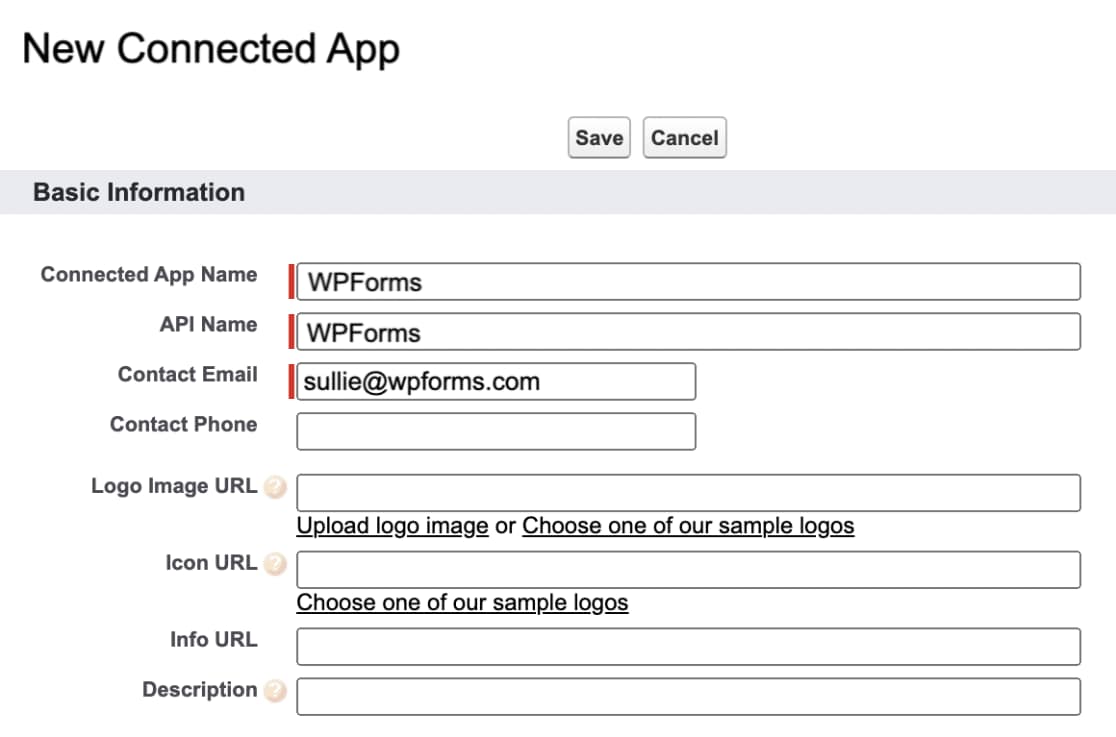
Enable OAuth Settings
Also, check the Enable OAuth Settings box. But before you can fill the information in this section, you will have to proceed with the next step.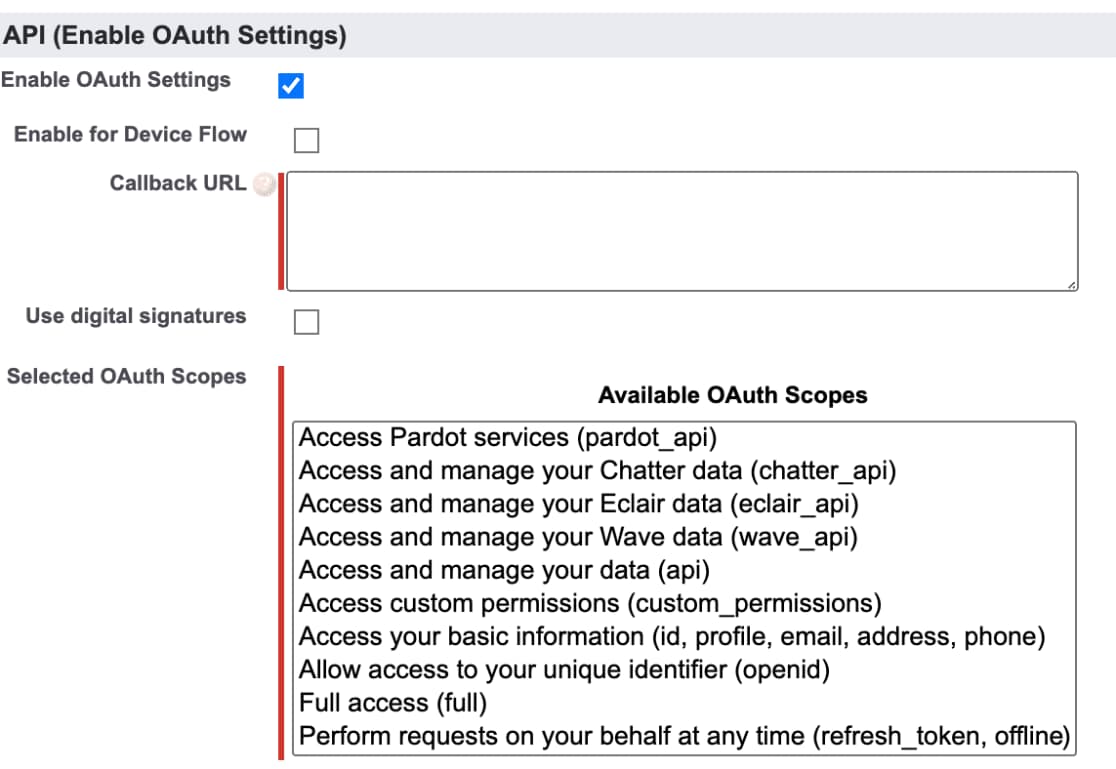
Copy callback URL
Go back to your WordPress site, navigate to the WPForms Settings page, and click on the Integration tab. From here, click on the Salesforce integration and the Add New Account button after it. Copy the callback URL from here, go back to the previous step, and paste it in the Callback URL field. Don’t close this window yet. We’ll be needing it for following Step 12.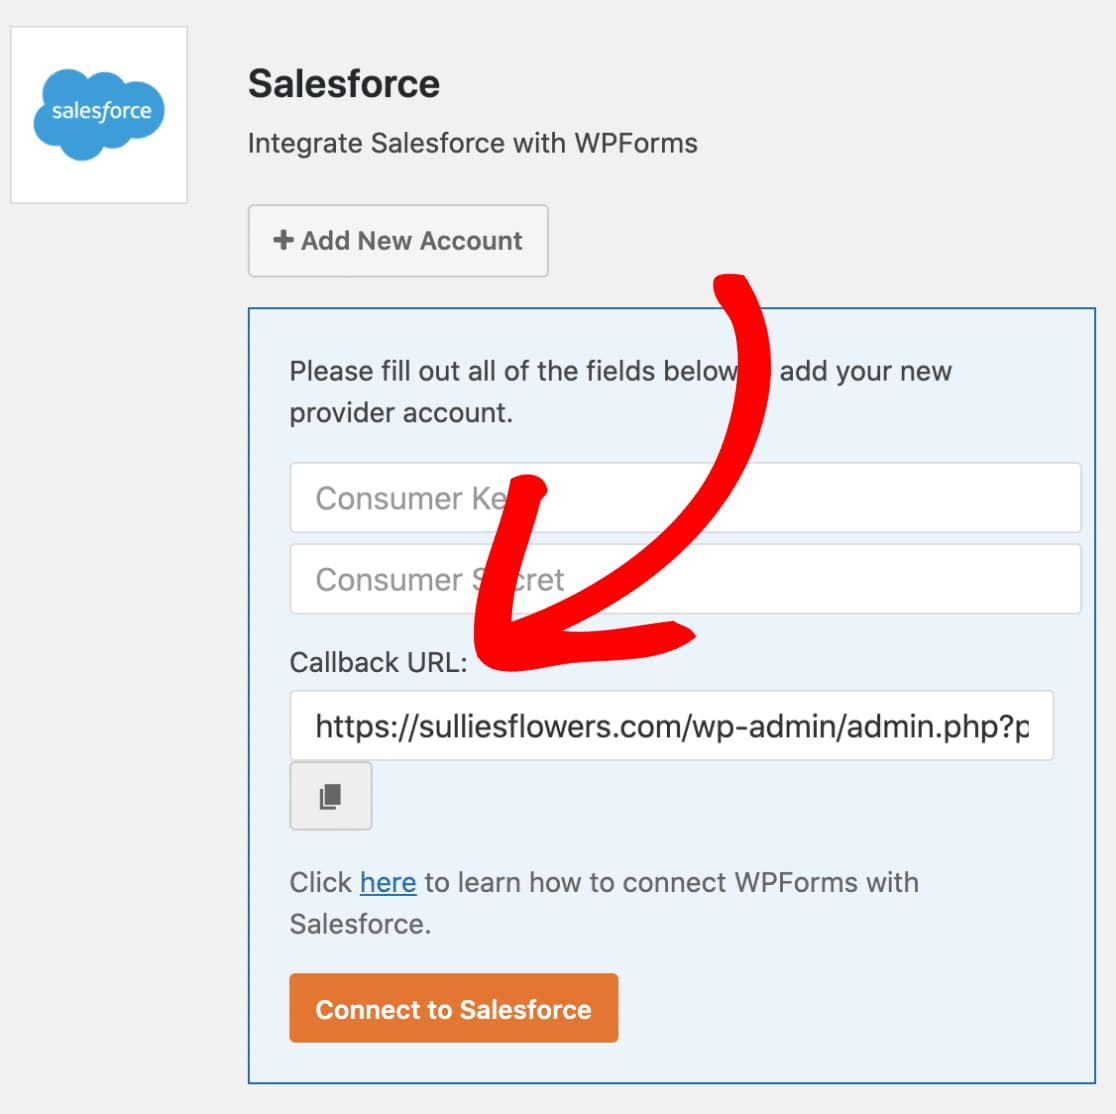
Select OAuth Scopes
Continuing with Step 7, add Access and manage your data and Perform requests on your behalf at any time OAuth scopes to the app from the available OAuth scope types.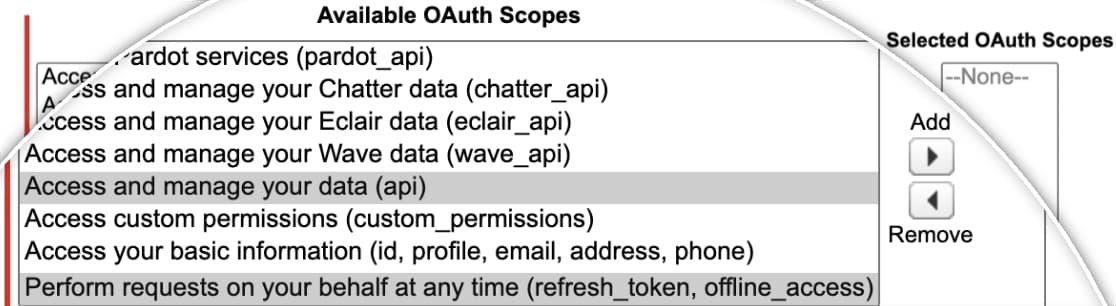
Wait for 10 minutes
Once you have added the callback URL and the two scopes to your Salesforce app, scroll down to the bottom of the page and save the changes. You will now be redirected to a new page asking you to wait for a few minutes. It is recommended that you wait for the whole ten minutes before you proceed so that you don’t face any issue at a later step.
Copy consumer key and consumer secret
You will now be displayed the app details. You can find the Consumer Key and Consumer Secret on this page which we will be needing in the next step.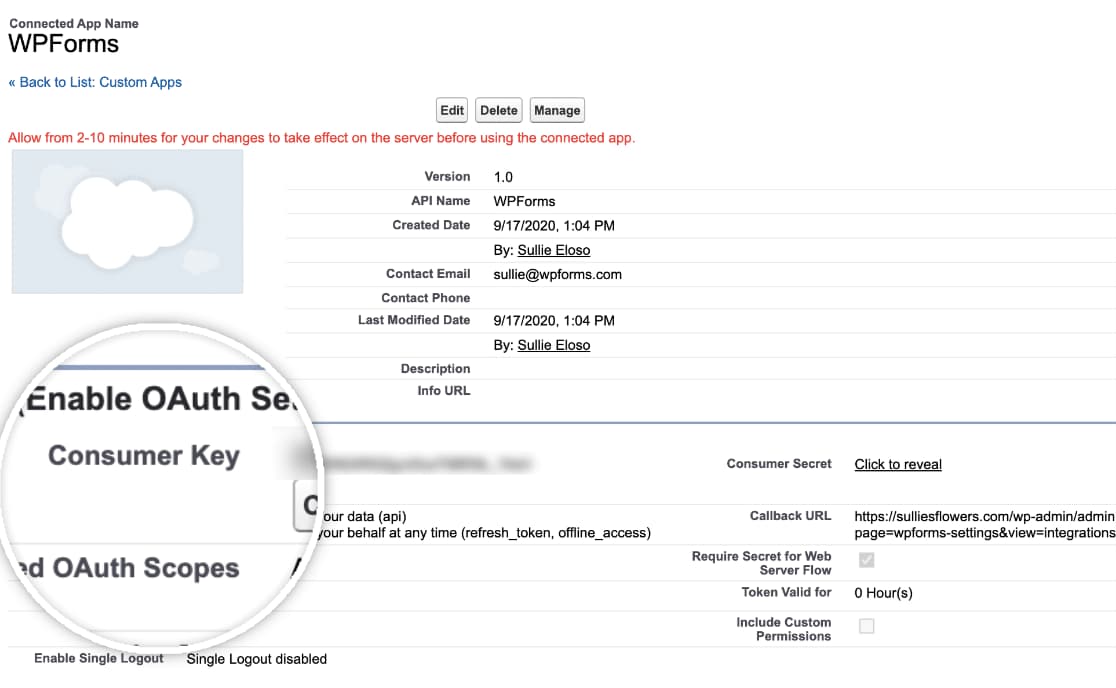
Paste and connect to Salesforce
Go back to Step 8 and paste the Consumer Key and Consumer Secret we got from Step 11. Remember earlier when I told you not to close the tab yet. Well, it’s for this step only. Once you have pasted them, click on the Connect to Salesforce button.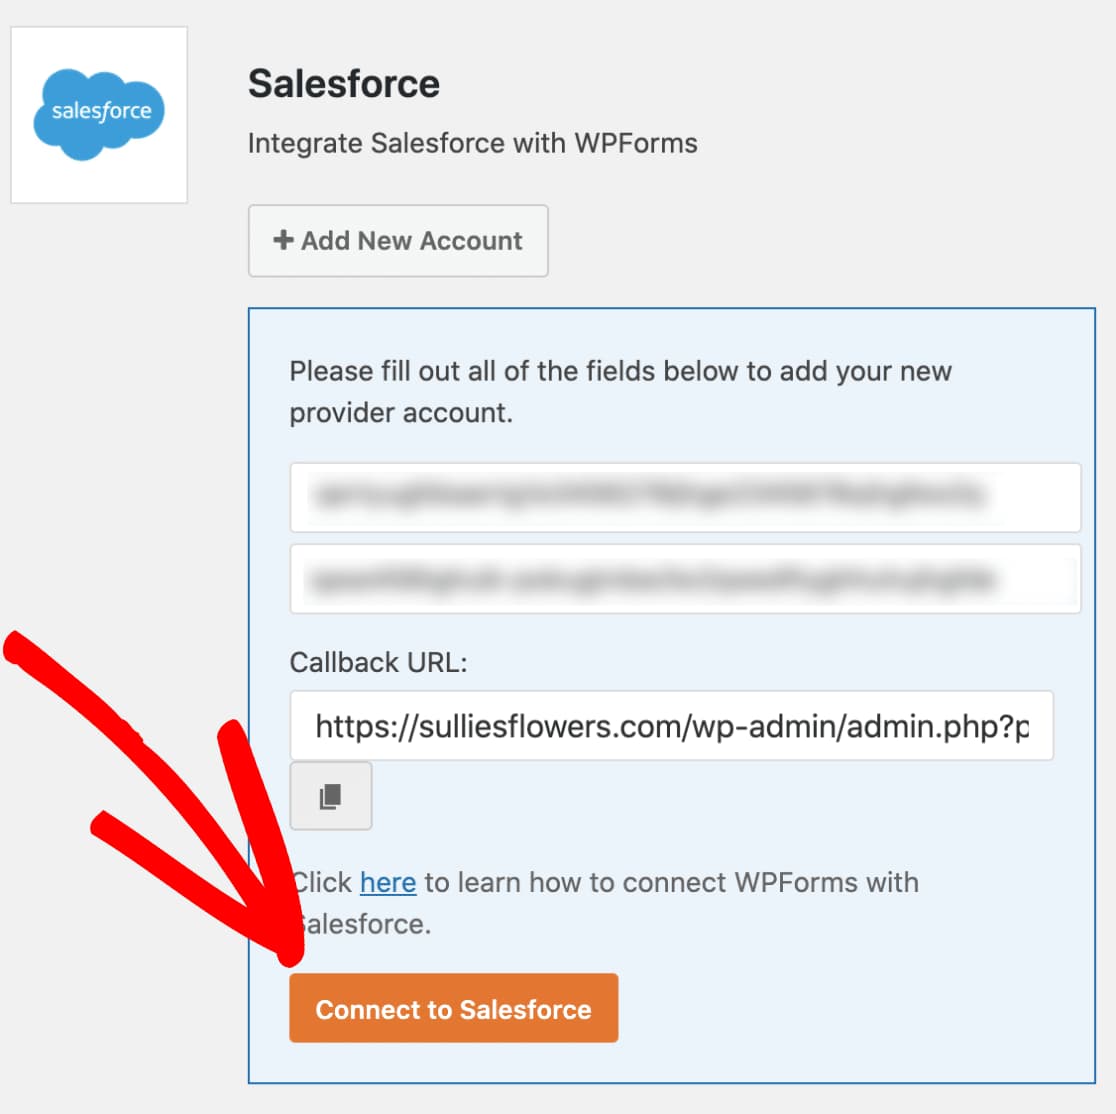
Login and allow access
It will now redirect you to the Salesforce login page from where you have to log in to your org once again and allow access to your account. Once you have allowed access, you will be redirected back to the WPForms integrations page on your WordPress site. Also, a success message will be displayed. You have now successfully integrated WPForms with Salesforce on your WordPress site.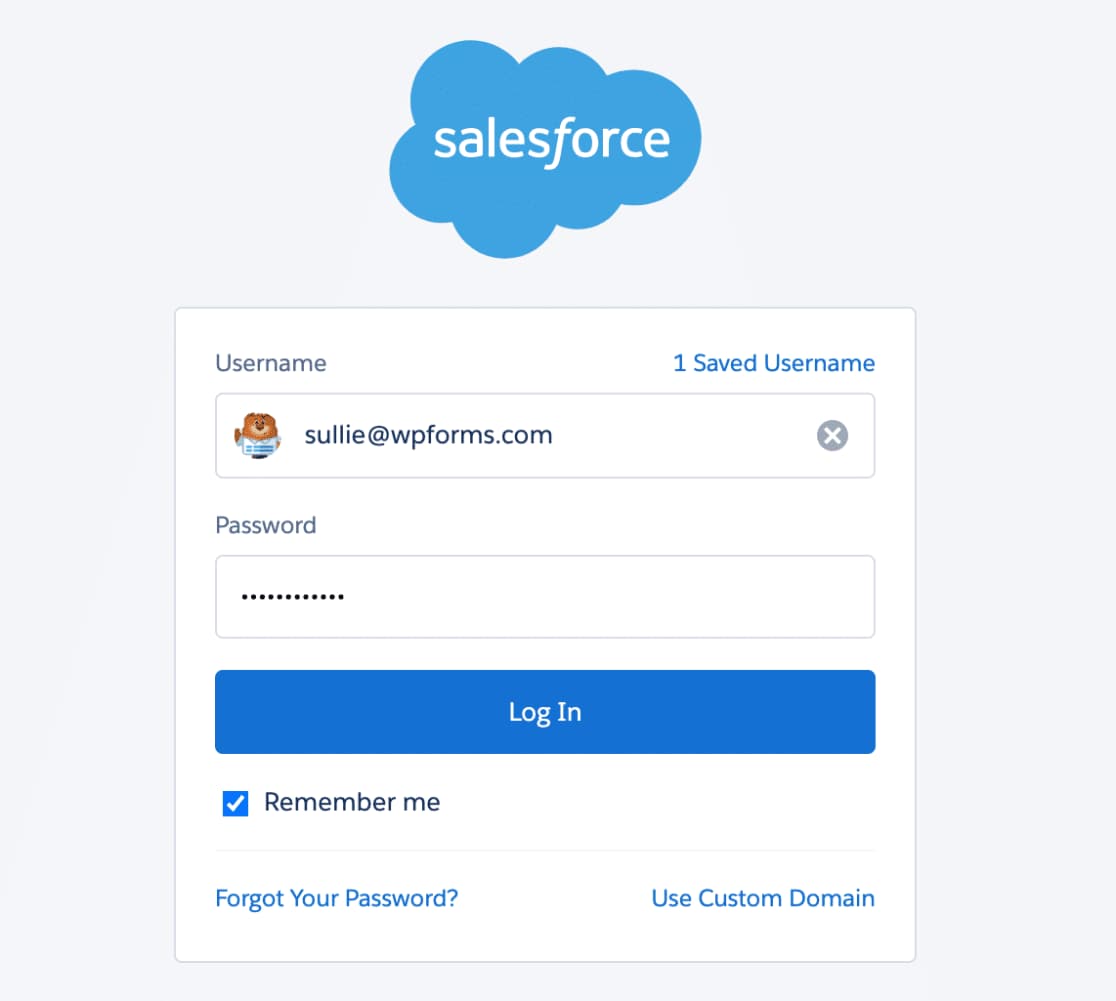
Create a WordPress form
You can now create a new WordPress form using WPForms and integrate it with any Salesforce object by going to Marketing –> Salesforce from the form builder screen and clicking on the Add New Connection button. Rest, you can do by just following the on-screen instructions.
That’s it. You now know how to integrate WordPress forms with Salesforce using a simple but powerful form builder plugin. All you have to do now is start creating new forms and map them to the correct Salesforce object and field.
P.S. You can read more about WPForms in my WPForms review or just by searching WPForms on my site.